> ## Documentation Index
> Fetch the complete documentation index at: https://docs.mangopay.com/llms.txt
> Use this file to discover all available pages before exploring further.
# Team management
> Manage your company's team members on the Mangopay Dashboard using role-based access control (RBAC)
Your company has one Mangopay Dashboard account which centralizes interactions with Mangopay for your whole team. On the Dashboard, you can manage your team members in full security thanks to Mangopay's role-based access control (RBAC).
A Dashboard team member must be assigned one or more **Dashboard roles**, which is a predefined set of actions that the person can take via the Dashboard.
The actions of each role are grouped into **scopes** and listed under each scope. A role has permission to **READ** the scope (meaning view-only) or **READ & WRITE** (meaning create and modify data).
**Note – Dashboard scopes apply only to Production**
The Dashboard roles that you assign only apply to the Production environment, and **you must also assign** the **Production API account** (also called **Production platform**) to the user for them to be able to take the actions allowed by their role.
For Sandbox API accounts, all users can take all available actions via the Dashboard for the Sandbox API accounts to which they are assigned. The ***Sandbox only*** role is designed for team members only needing access to Sandbox API accounts.
Some Dashboard actions relate to Mangopay API endpoints that can be used via the Dashboard – for example, creating a wallet for a user, or submitting dispute evidence for a transaction. These actions are aligned with the [API key scopes](/api-reference/overview/api-keys) but not dependent on them, which means that a Dashboard team member can perform the action via the Dashboard regardless of how the platforms API keys are set up.
Other Dashboard scopes and actions relate to actions that are exclusively available via the Dashboard, such as creating Sandbox API keys or inviting team members.
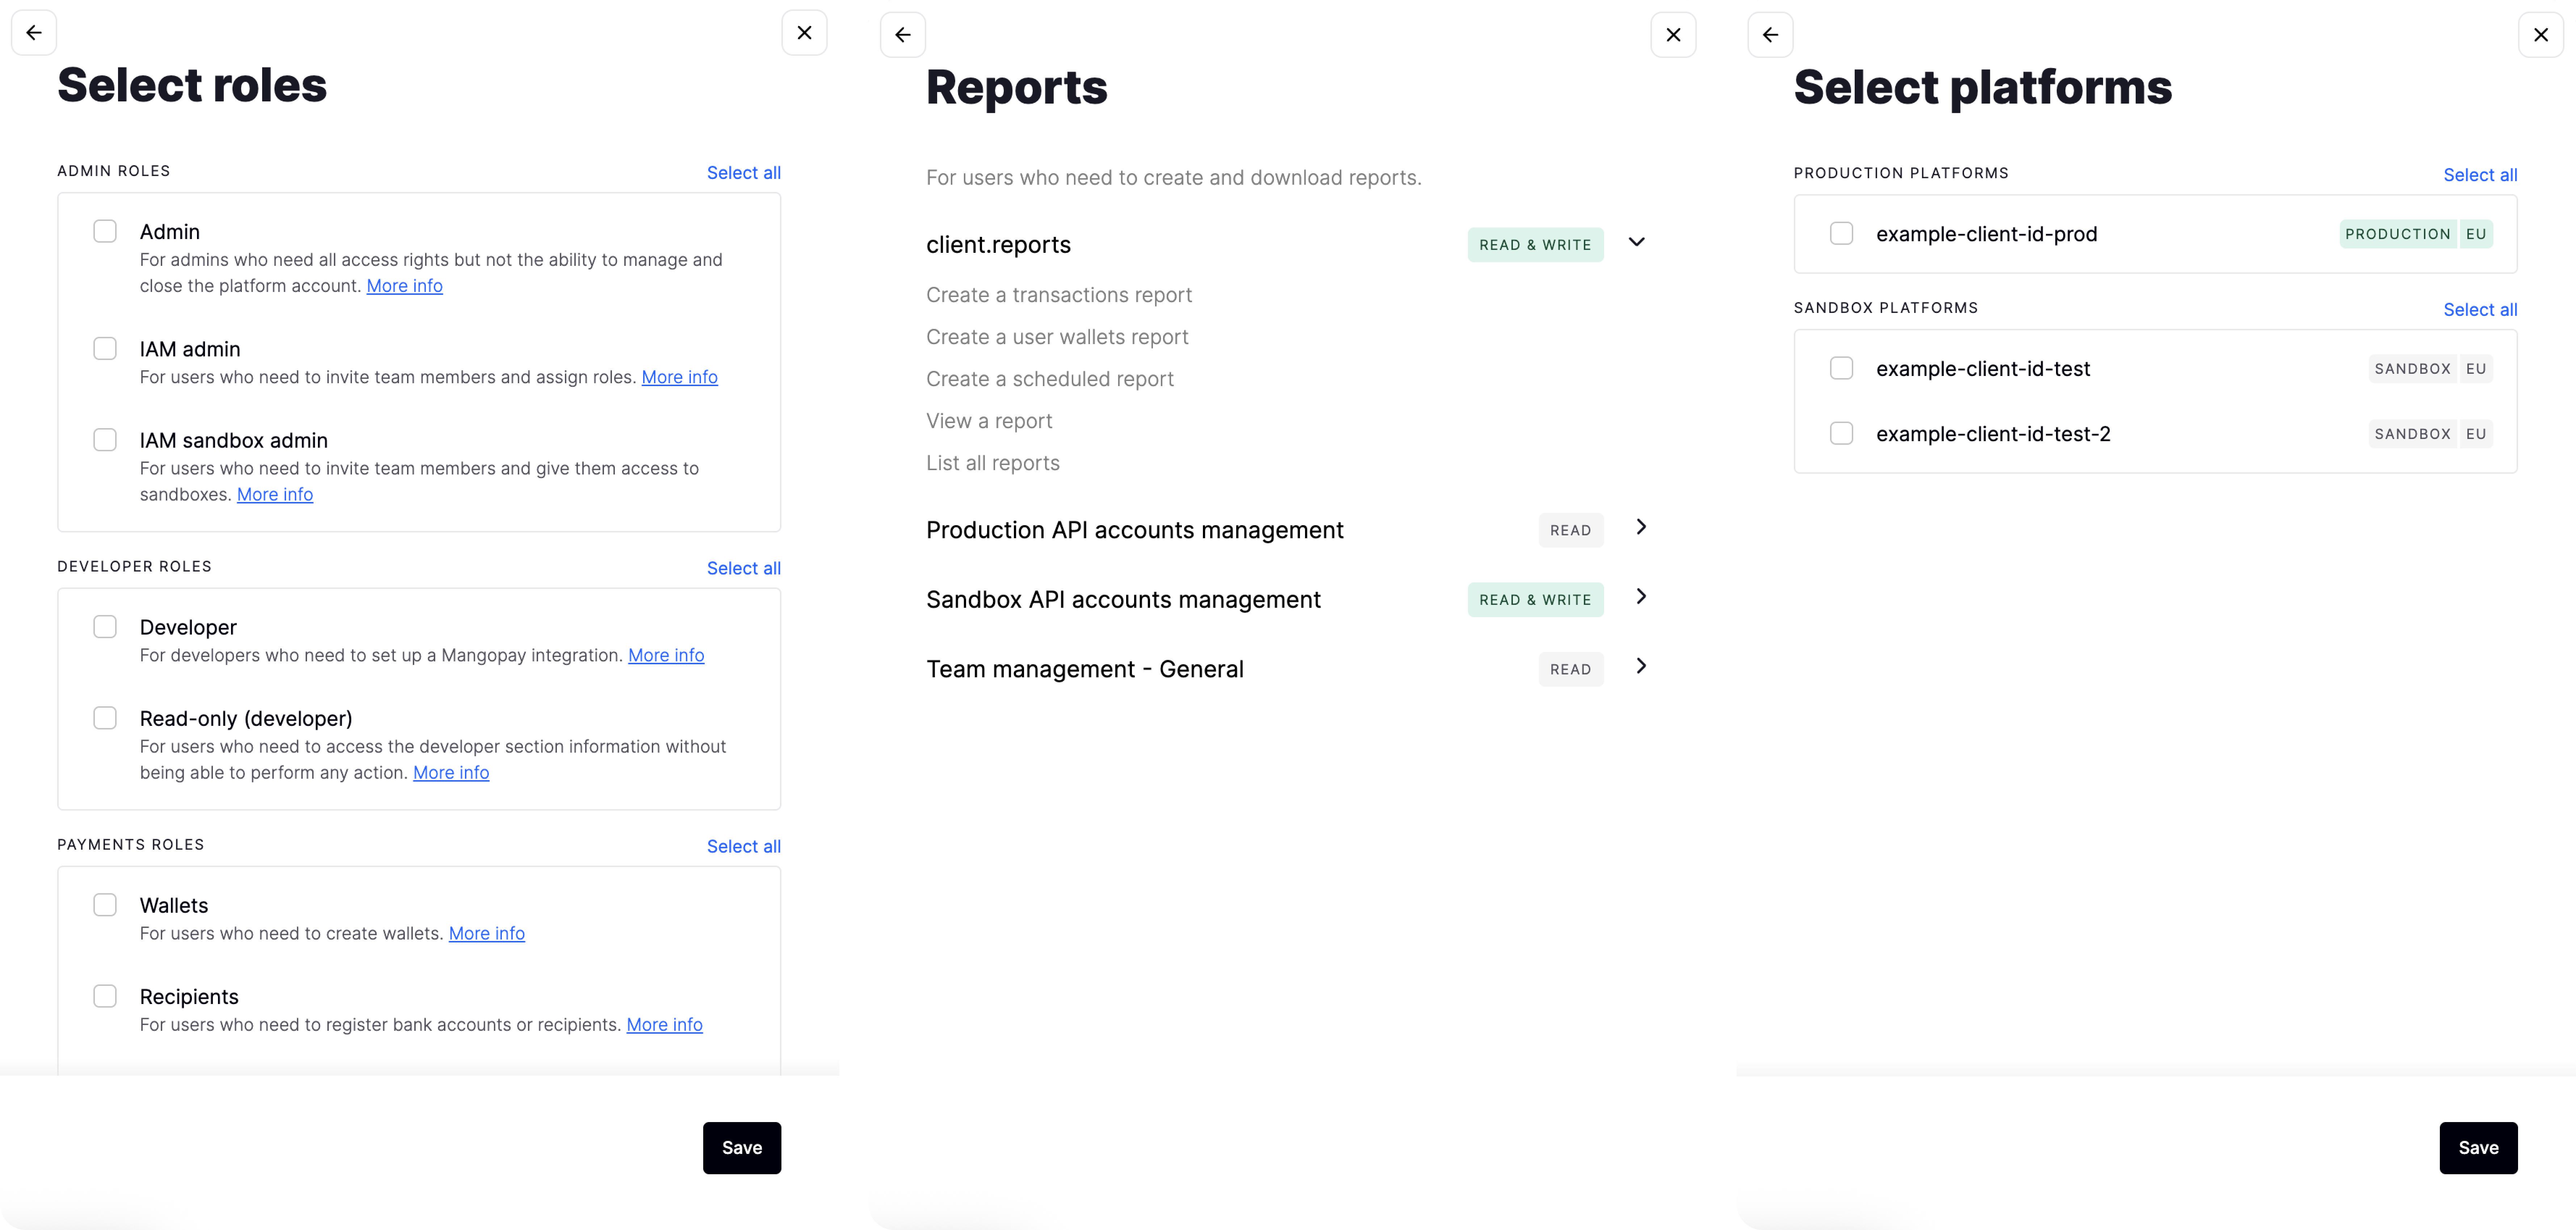
The screenshots below show:
* The roles you can select for a team member
* More information about the ***Reports*** role, showing its scopes in **READ** or **READ & WRITE** permissions, and the actions in the **client.reports** scope
* The platforms to select, with an example Production API account and two Sandbox API accounts
 ### Invite a team member
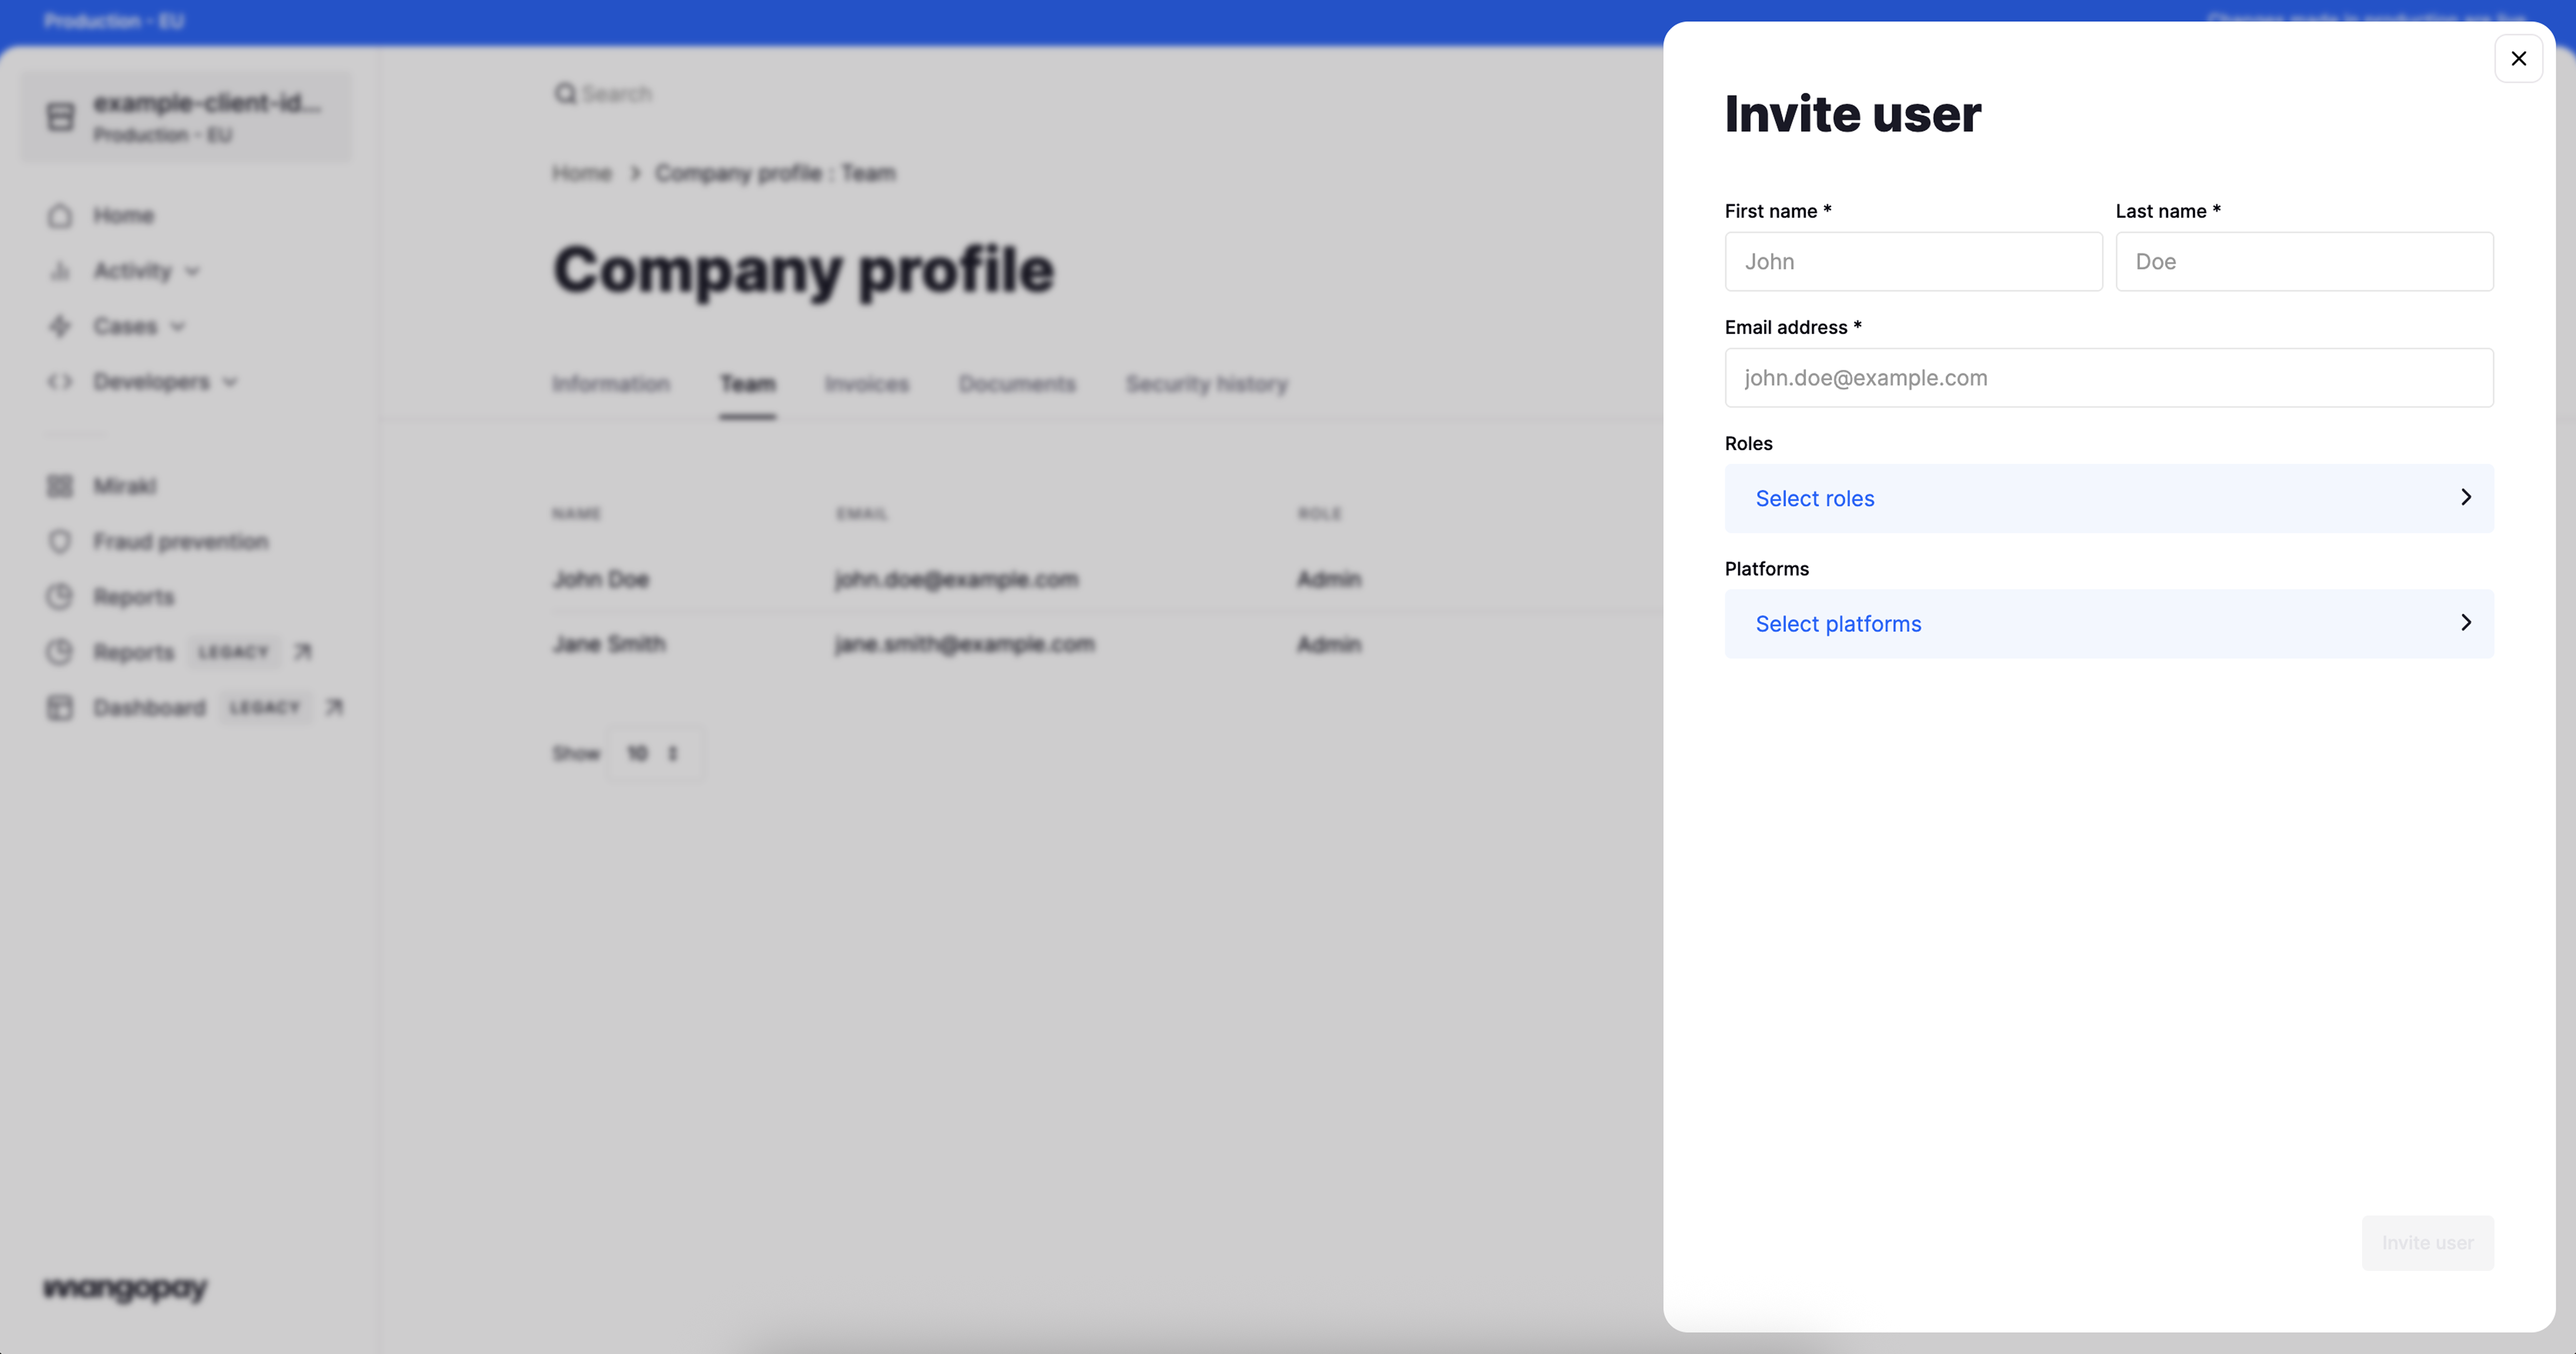 To invite someone to your Mangopay Dashboard:
1. In the top right, click the building icon to go to the ***Company profile***
2. On the ***Team*** tab, click the ***Add member*** button in the top right
3. Enter the name and email address
4. Assign one or more **roles** and click the ***Save*** button
5. Assign the **platforms** (also called **API accounts)** they should have access to, and click the ***Save*** button
6. Click the ***Invite user*** button
The user receives an email inviting them to create a password. On the ***Team*** tab, the user shows as ***Pending*** until they create a password and log in for the first time.
### Modify roles assigned to a team member
To modify the roles assigned to an existing user:
1. In the top right, click the building icon to go to the ***Company profile***
2. Click the vertical three-dot icon (**⋮**) next to the user on the ***Team*** tab and click ***Edit details*** (or: click the user to see their details and then click the ***Edit details*** button in the top right)
3. Modify the roles and/or platforms, clicking ***Save*** in each case, and then click ***Save*** again
### Transfer ownership
You can assign the Admin role to more than one team member, but the Owner role can only be held by one person.
The Owner role allows that team member to modify the platform’s billing information, manage the registered platform information, and close the account.
The team member with the Owner role can pass the Owner scope to another team member. To do so, the Owner needs to:
1. In the top right, click the building icon to go to the ***Company profile***
2. Click the vertical three-dot icon (**⋮**) next to the user in the ***Team*** tab and click ***Transfer ownership***
To invite someone to your Mangopay Dashboard:
1. In the top right, click the building icon to go to the ***Company profile***
2. On the ***Team*** tab, click the ***Add member*** button in the top right
3. Enter the name and email address
4. Assign one or more **roles** and click the ***Save*** button
5. Assign the **platforms** (also called **API accounts)** they should have access to, and click the ***Save*** button
6. Click the ***Invite user*** button
The user receives an email inviting them to create a password. On the ***Team*** tab, the user shows as ***Pending*** until they create a password and log in for the first time.
### Modify roles assigned to a team member
To modify the roles assigned to an existing user:
1. In the top right, click the building icon to go to the ***Company profile***
2. Click the vertical three-dot icon (**⋮**) next to the user on the ***Team*** tab and click ***Edit details*** (or: click the user to see their details and then click the ***Edit details*** button in the top right)
3. Modify the roles and/or platforms, clicking ***Save*** in each case, and then click ***Save*** again
### Transfer ownership
You can assign the Admin role to more than one team member, but the Owner role can only be held by one person.
The Owner role allows that team member to modify the platform’s billing information, manage the registered platform information, and close the account.
The team member with the Owner role can pass the Owner scope to another team member. To do so, the Owner needs to:
1. In the top right, click the building icon to go to the ***Company profile***
2. Click the vertical three-dot icon (**⋮**) next to the user in the ***Team*** tab and click ***Transfer ownership***