Onboarding and synchronizing sellers
To onboard your sellers, Mangopay’s Mirakl Connector leverages:
- The KYC banner in the Mirakl Seller Dashboard
- A series of frontend components built and hosted by Mangopay
Your sellers are guided through all the necessary steps at each stage, and the onboarding flows are fully compliant with KYC and SCA requirements.
Benefits
Faster time-to-market
- Pre-built, compliant verification journeys hosted by Mangopay
- No integration effort
Faster onboarding
- Optimized verification flows with high pass rates with clear error messages
- Fewer visible fields: reduced friction for sellers
- Mobile-friendly, localized experiences to increase conversion
- Direct user feedback ensures fewer errors in bank details
- Localized experiences in the Seller’s language
Compliant by design
- Mandatory SCA on Mangopay Account creation and recipient registration
Prerequisites
Mangopay:
- SCA must be enabled
- Hosted Identity Verification must be enabled
- Hosted onboarding must be configured in the Mirakl Connector
Mirakl:
- Mandatory: KYC banner activation
- Enable the KYC status and banner in Mirakl by contacting Mirakl Support
- Mangopay must be the only system to update the KYC banner
- Optional: Adjust Seller bank account configuration in Mirakl to ensure no bank account details are collected within Mirakl
Overview
All of Mangopay’s onboarding interactions leverage the KYC banner for communication with the seller and for providing links to the Mangopay-hosted webpages.
There are 3 main pathways:
What’s changing
This page describes the full seller onboarding pathways hosted by Mangopay. The improvements being brought to previous versions of the seller onboarding are:
- Addition of hosted SCA enrollment on Mangopay Account creation
- Ability to re-enroll in SCA if legal representative phone number or email changed
- New Recipient (bank account) creation experience, including SCA
- Ability to view the Recipient details once created
Mangopay Account creation
The account creation flow is as follows:
Mangopay detects new Seller
Every 5 minutes, Mangopay’s Mirakl Connector checks for new sellers on your platform. If the connector detects a new seller, it updates Mirakl’s KYC banner with messaging and a link to the Mangopay hosted webpage.

Seller clicks the link to hosted account registration
The link takes the Seller to a hosted webpage to create their Mangopay Account (which is a Legal User object in Mangopay API terms).
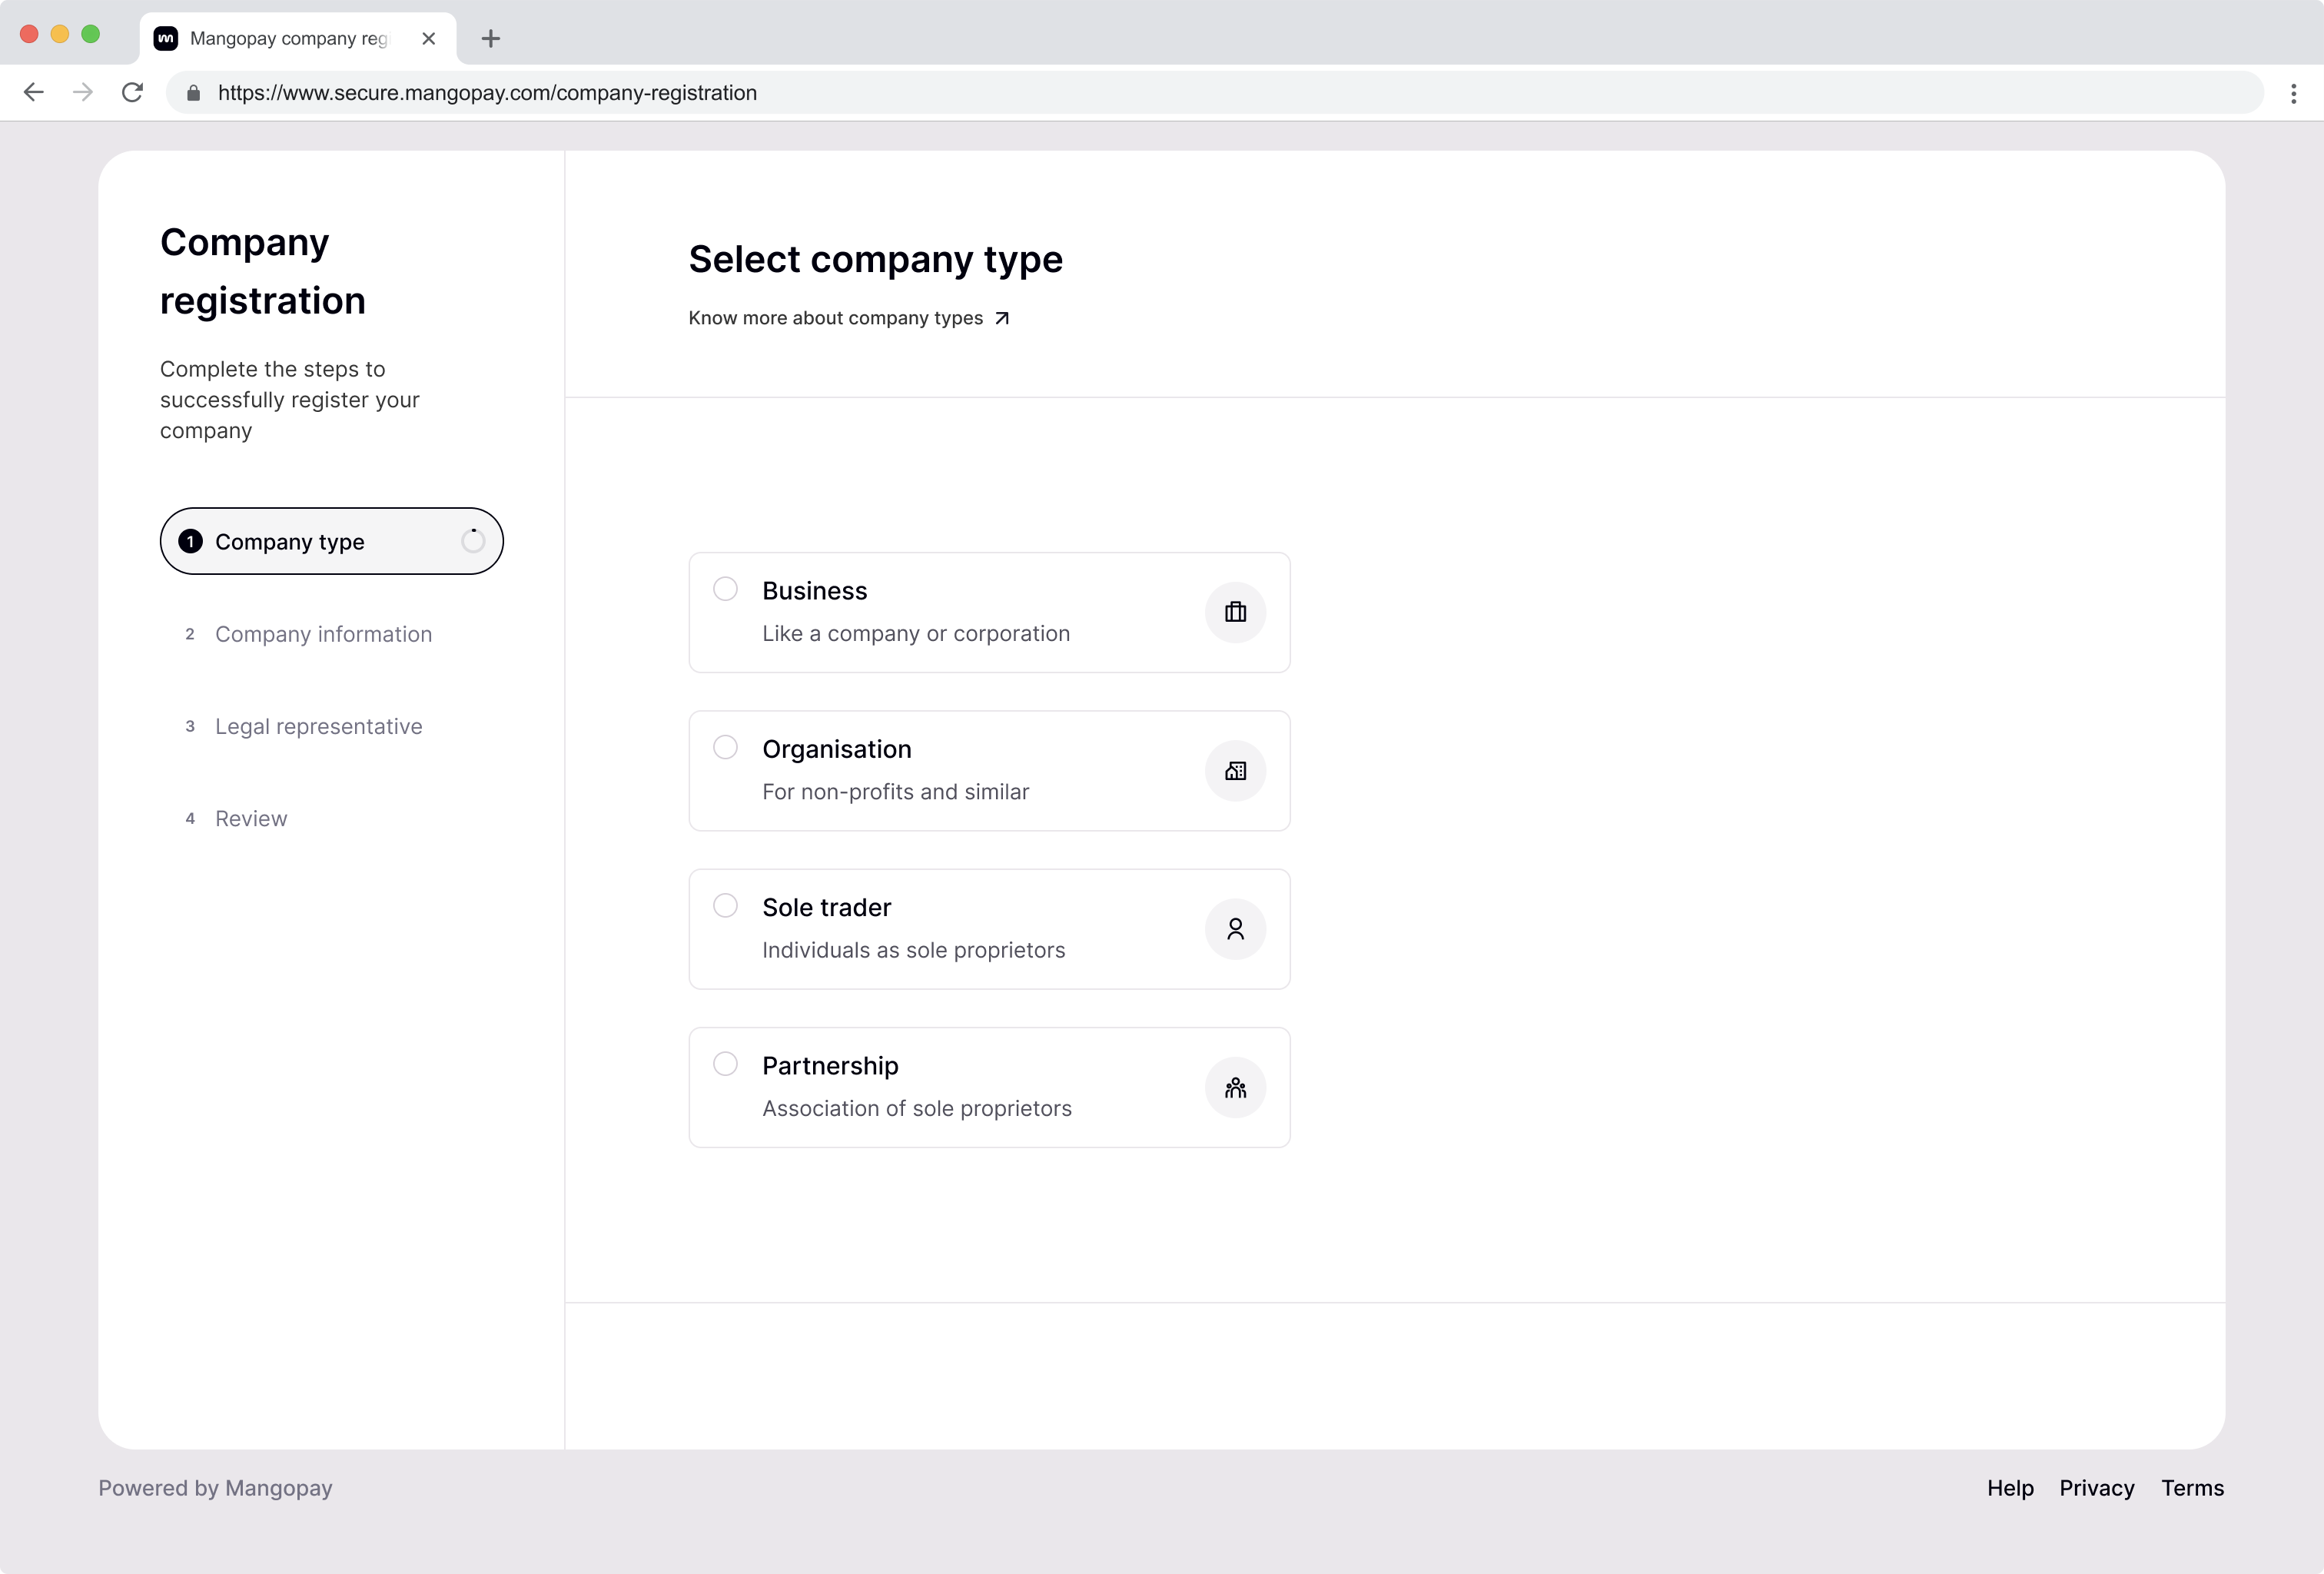
Seller selects entity type
The Seller selects the type of their entity, which corresponds to their LegalPersonType. The KYB local page lists local legal structures per country and the legal user type they should be registered as.
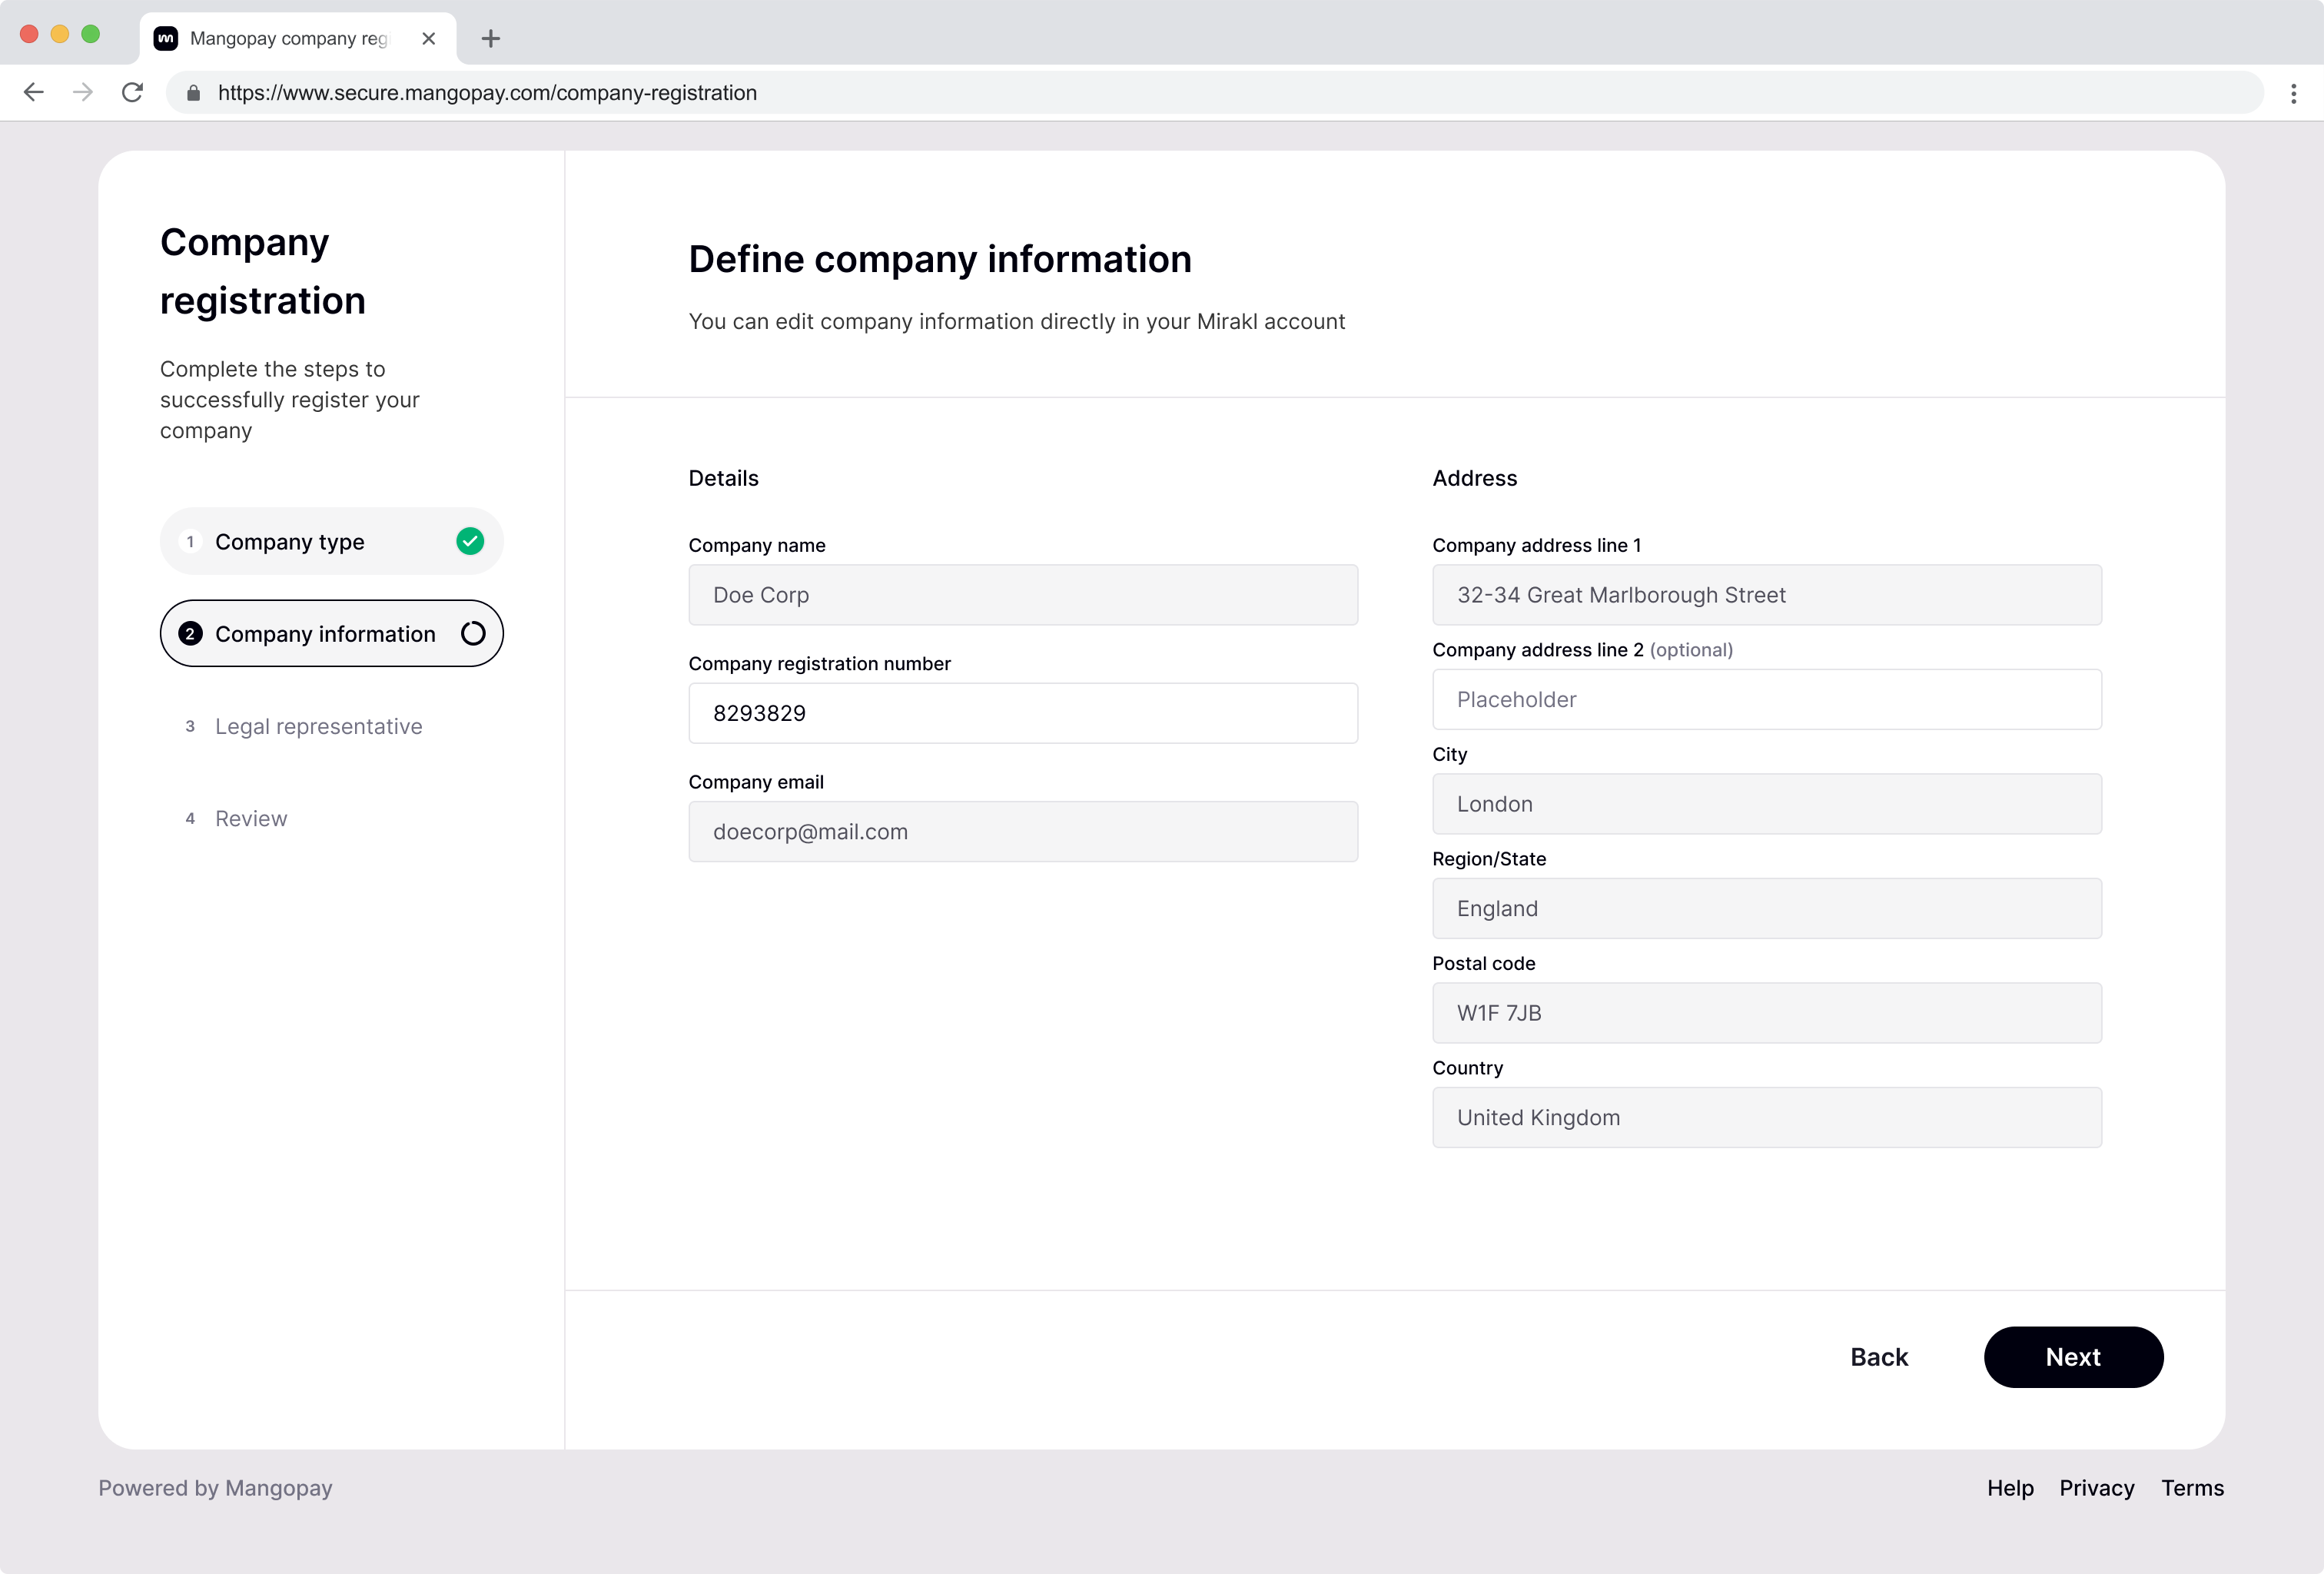
Seller enters business details
The next screen presents information take from Mirakl for the Seller to check. If anything is not correct, the Seller needs to return to Mirakl to update it.
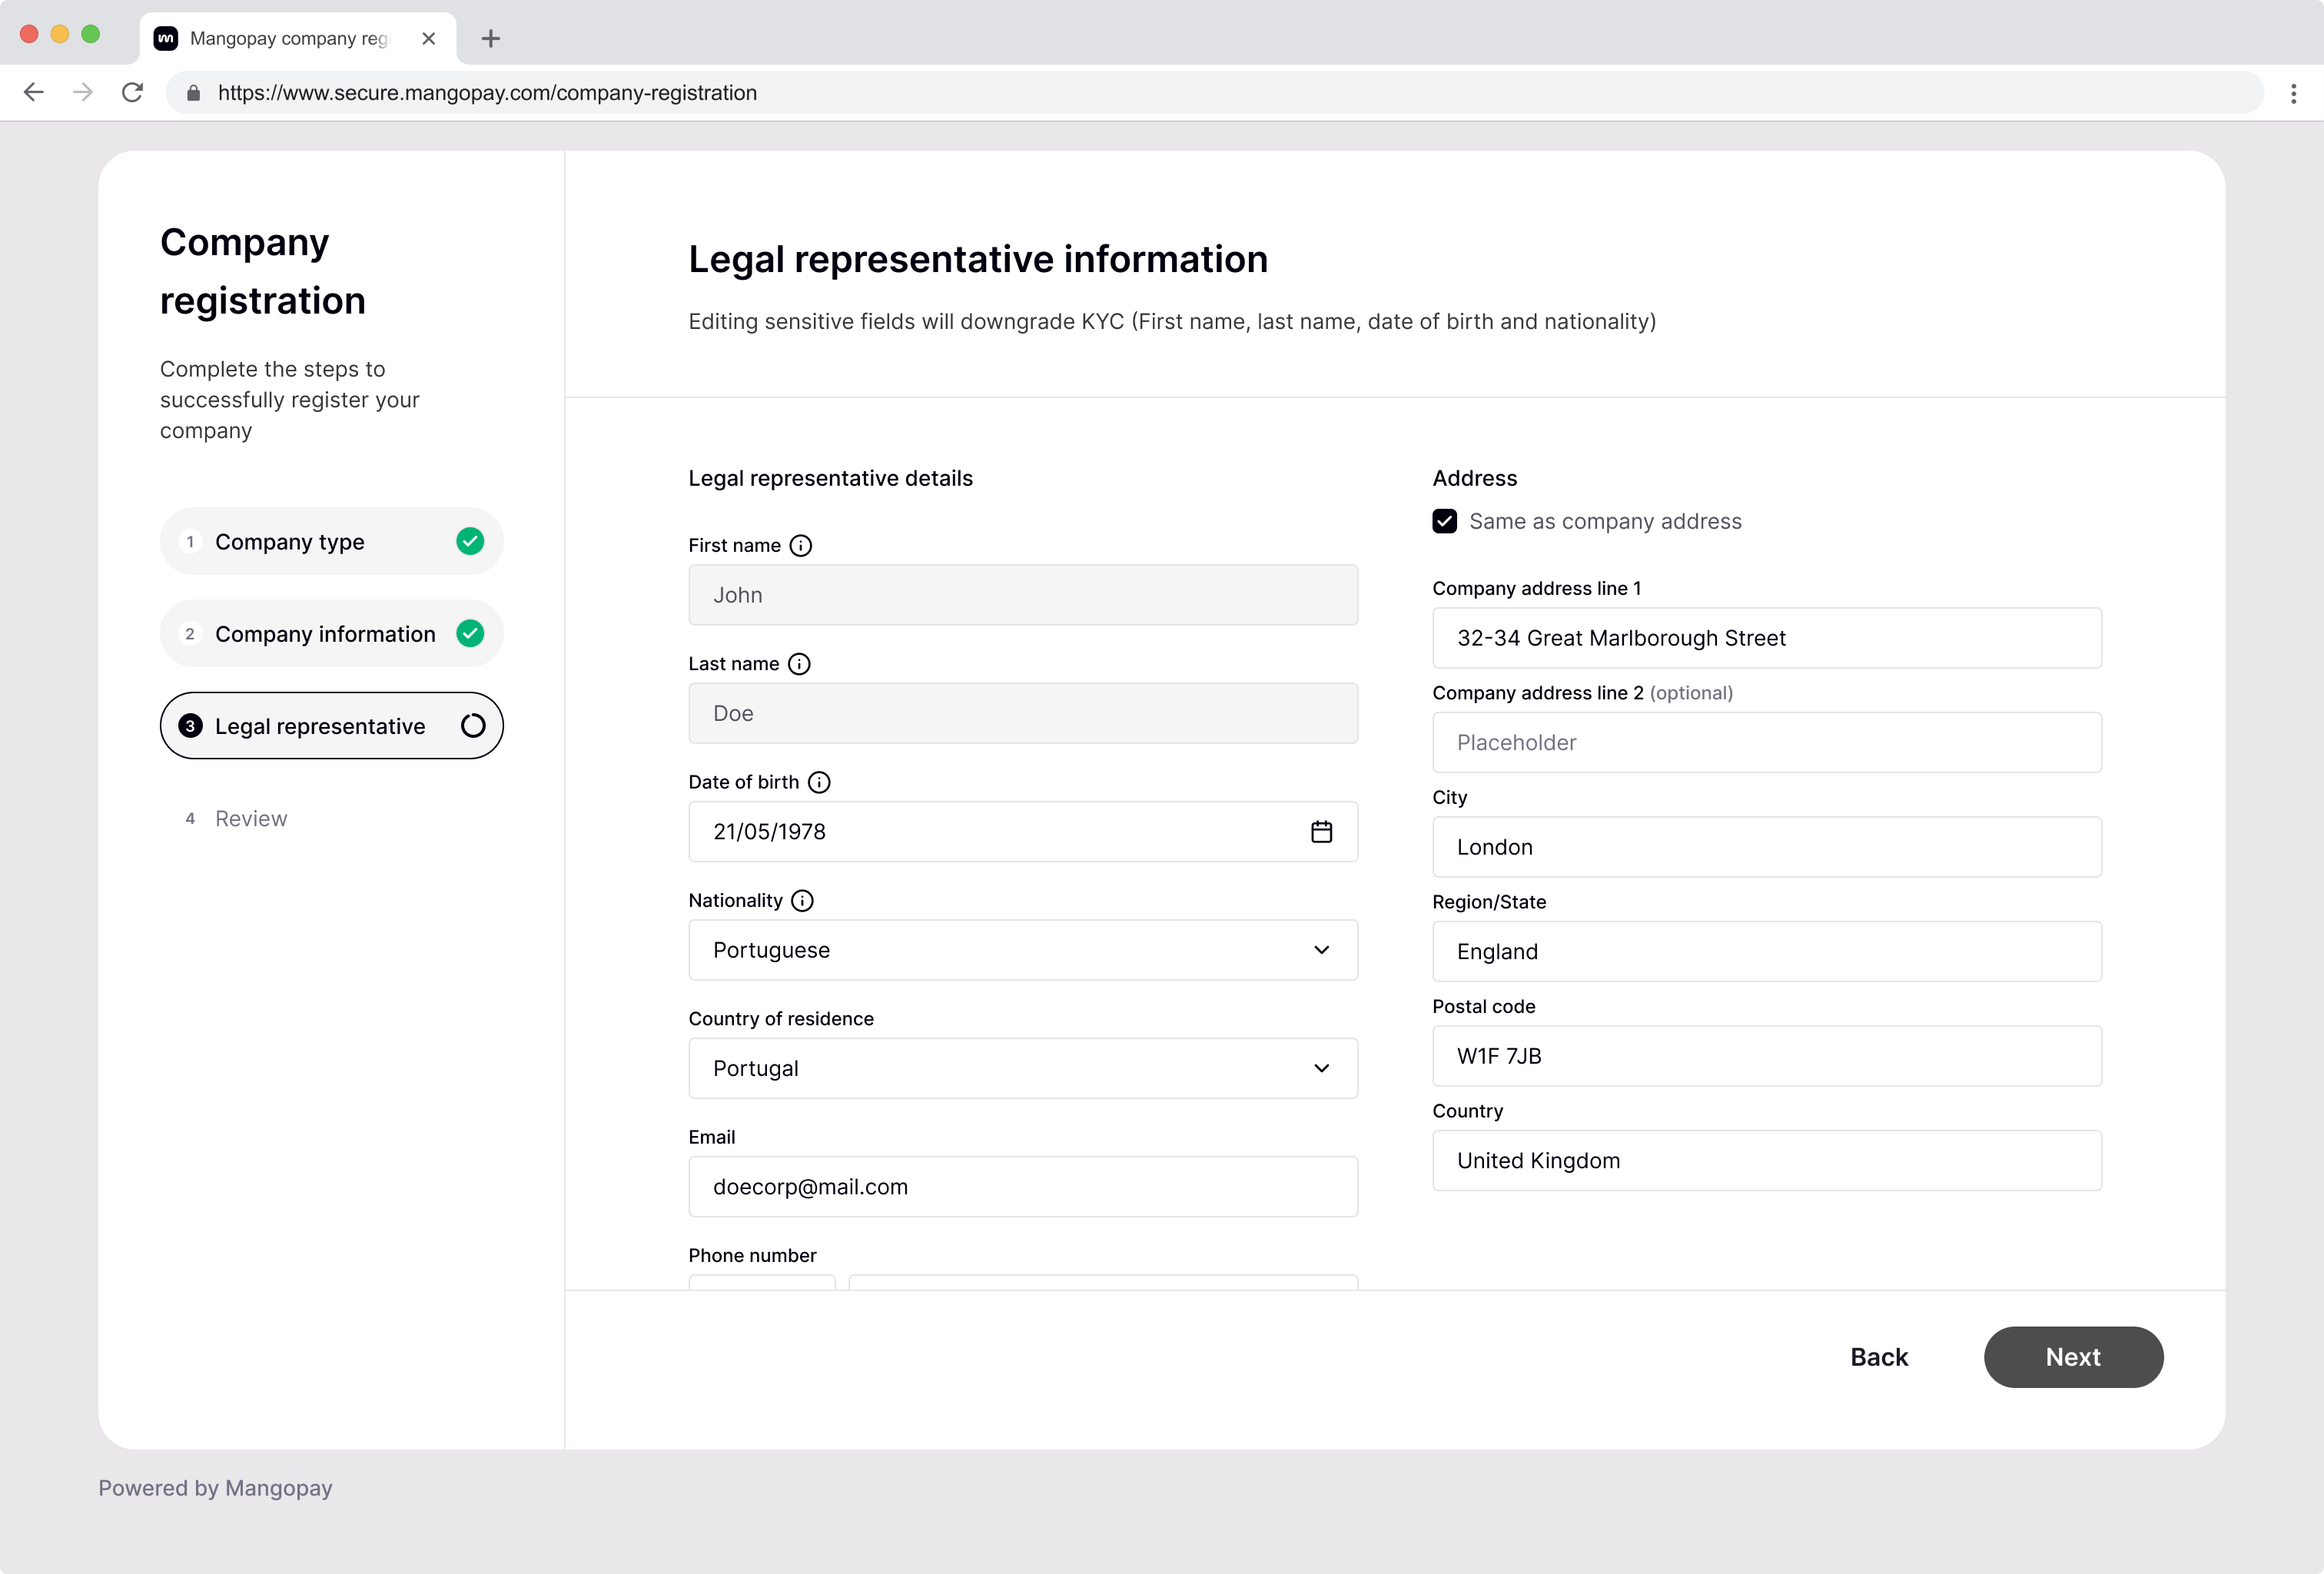
Seller declares a legal representative
The Seller declares an individual as the legal representative of the business.
The email and phone number declared for the legal representative are used for SCA in the next step. The individual’s name and nationality are used in the KYC liveness check.
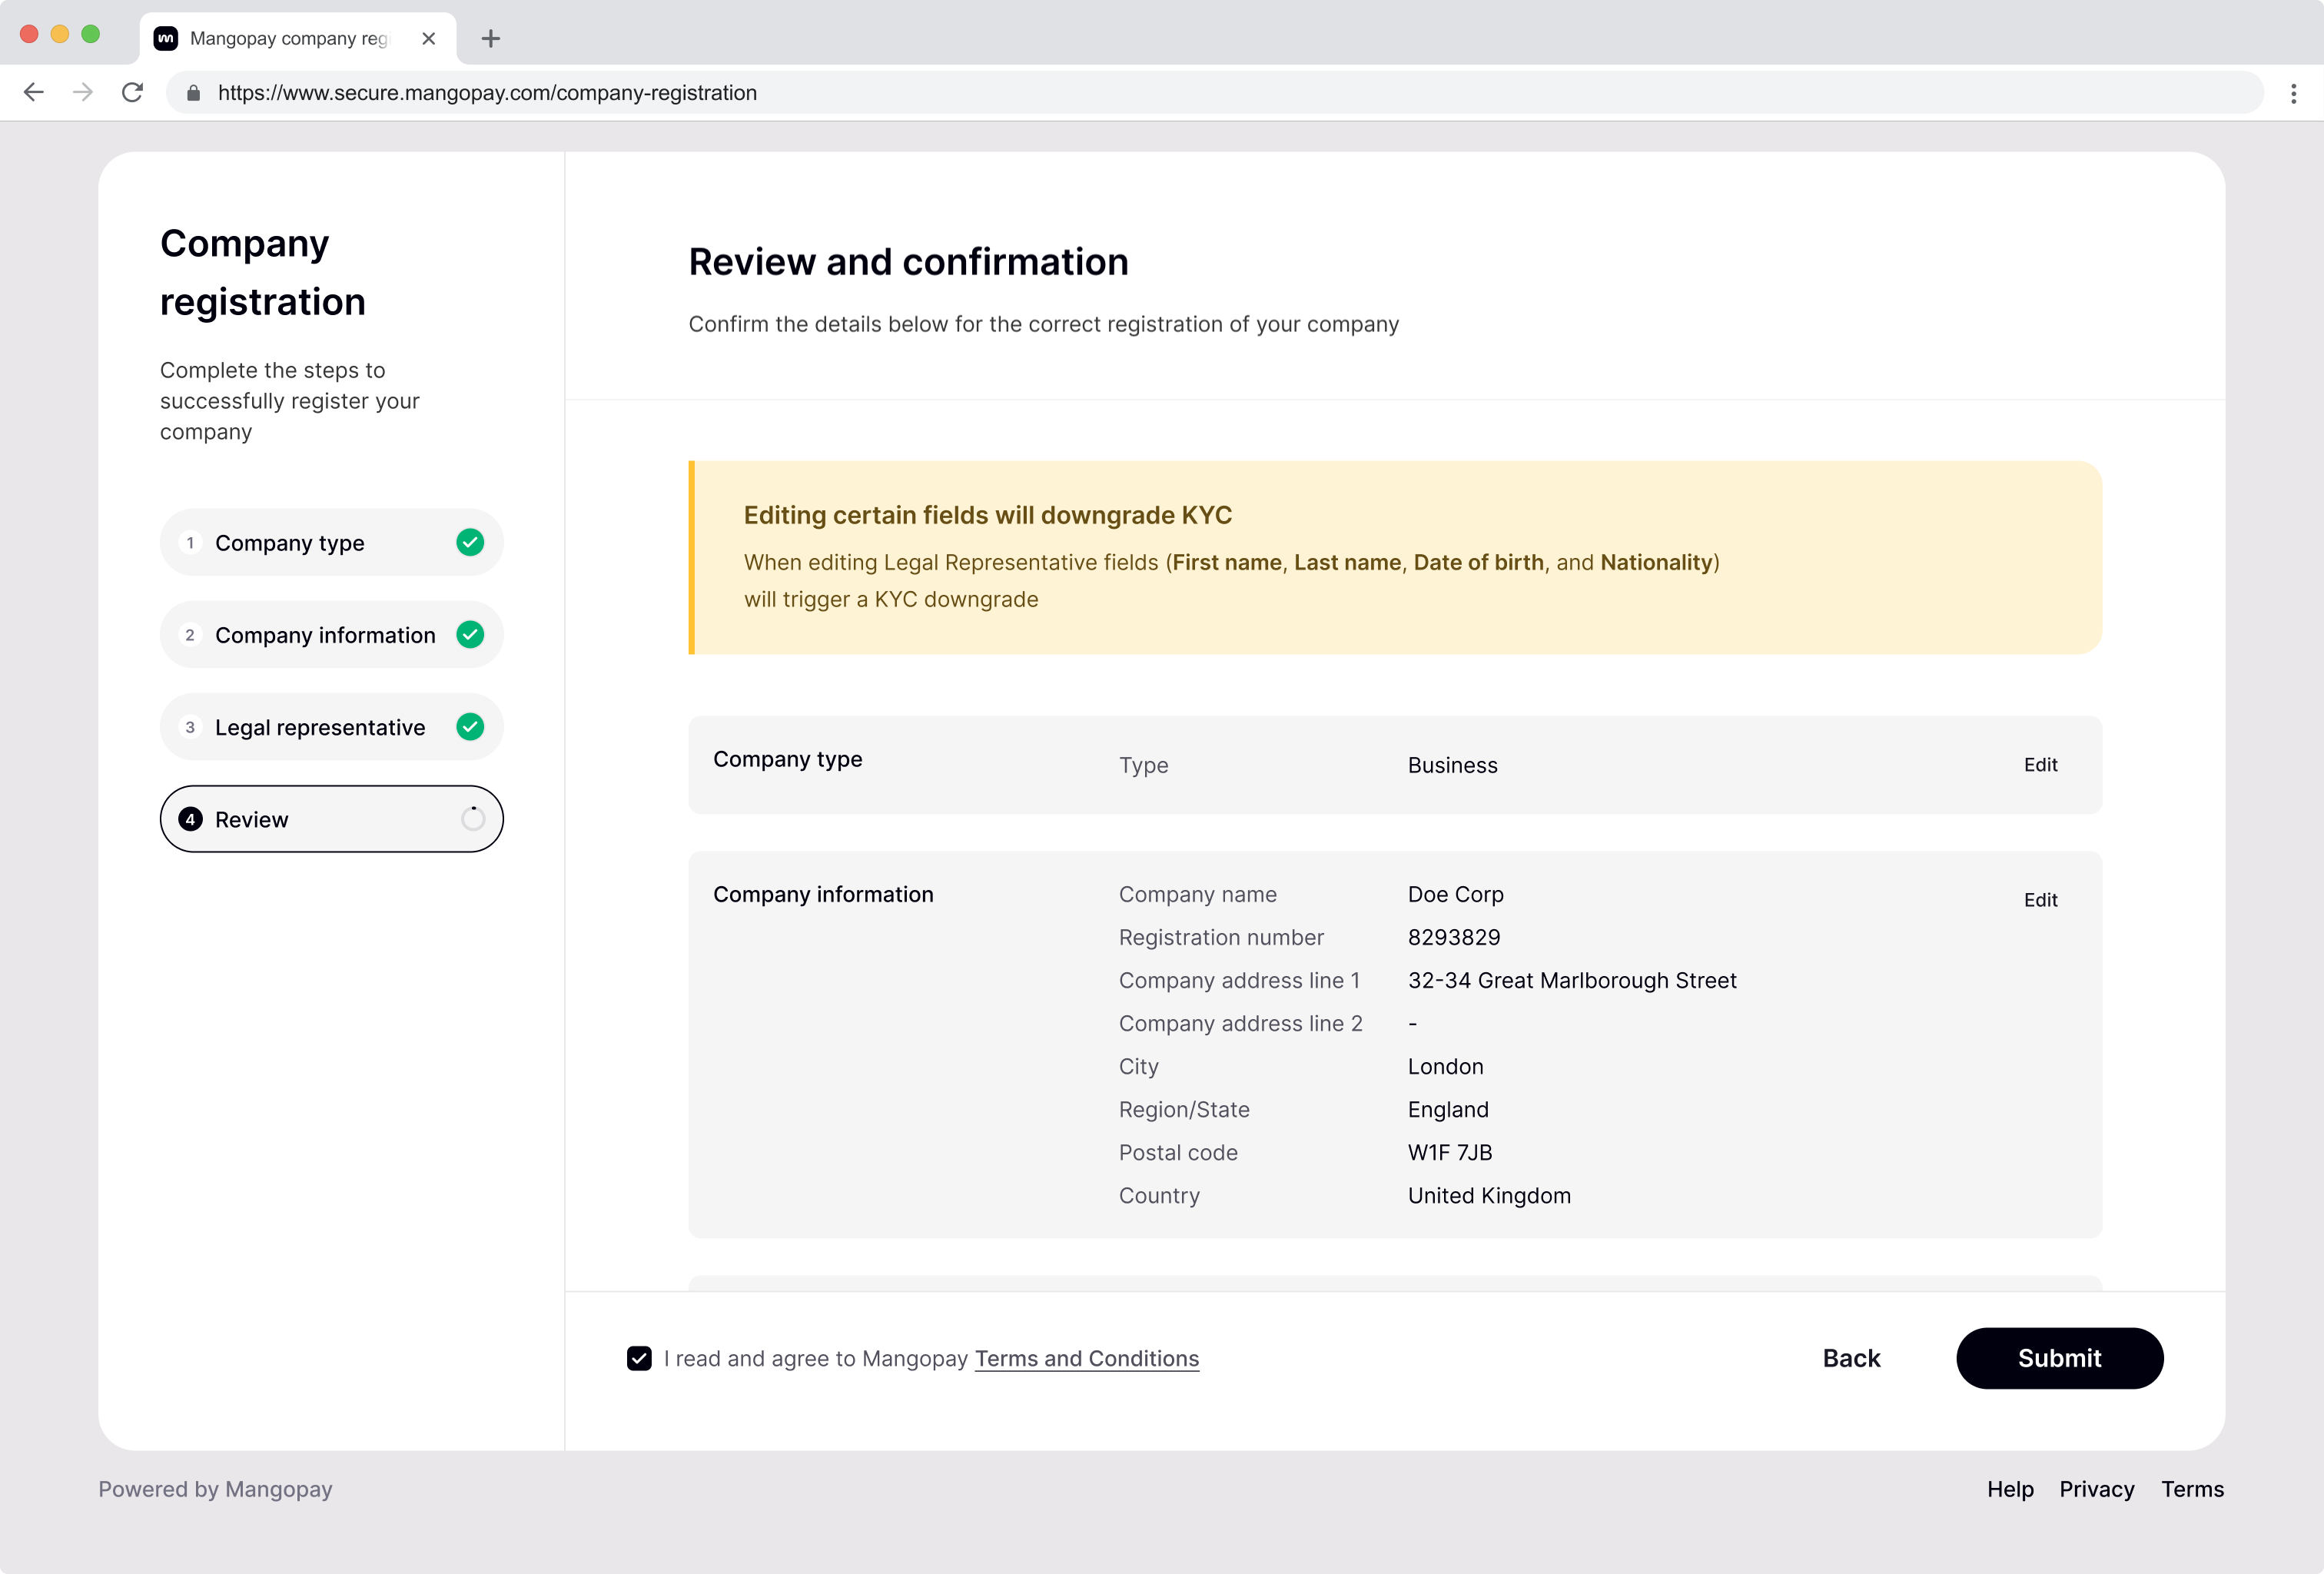
Mangopay creates user and wallet objects
Once the form is complete, the connector calls the POST Create a Legal User endpoint to create the Legal User for the Seller, and the POST Create a Wallet endpoint to create their wallet.
The Seller enrolls in Mangopay's SCA
After the registration form, the Seller is redirected to Mangopay’s hosted SCA session to enroll their chosen authentication factors.
Note – Connector also handles SCA re-enrollment
If the Seller wishes to modify the phone number or email they used to enroll in SCA, then they are again redirect to Mangopay’s SCA experience to re-enroll their new contact details.
Identity verification (KYC/KYB)
The KYC/B verification flow is as follows:
Mangopay detects Seller without KYC verification
Mangopay’s Mirakl Connector checks for Sellers that are not yet KYC verified by Mangopay. If detected, the connector updates Mirakl’s KYC banner with messaging and a link to the Mangopay hosted webpage.
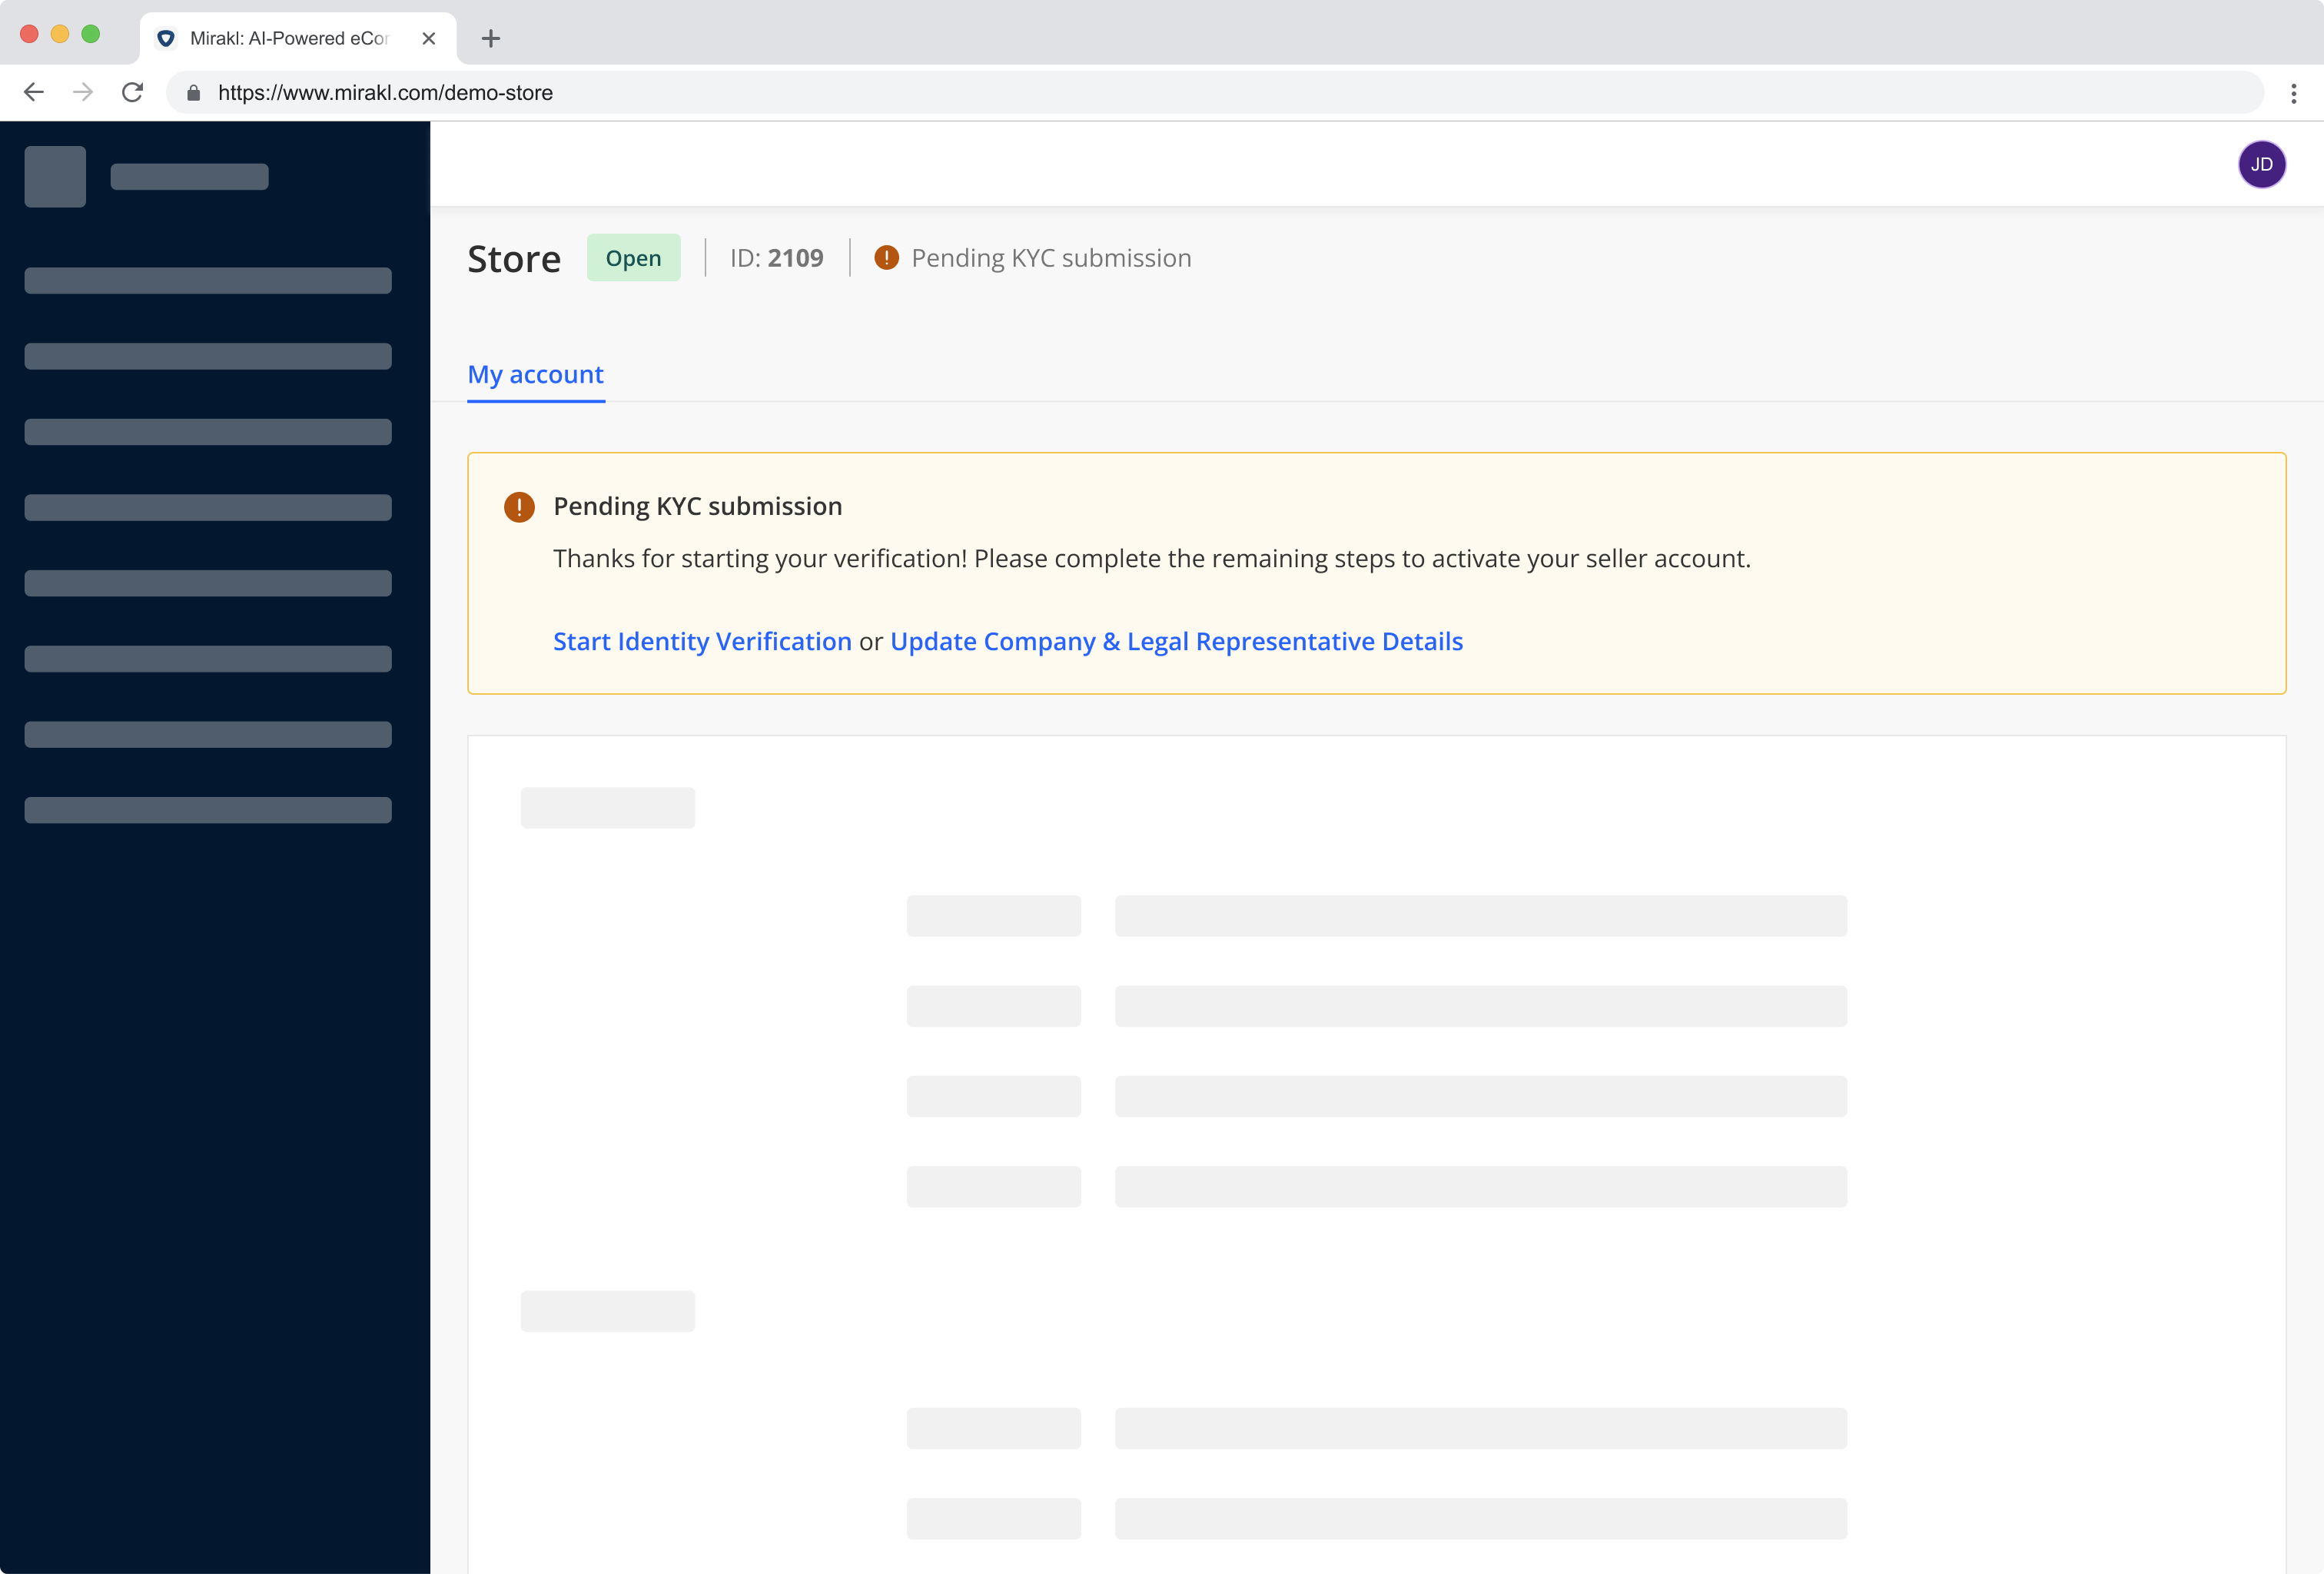
The Seller clicks the link to hosted KYC verification
The link takes the Seller to a hosted webpage to complete their KYC verification. To run the hosted KYC session, the connector calls the POST Create an IDV Session endpoint.
The Seller completes all parts of the session
The KYC process involves submitting business details and business documents. KYC verification also requires a liveness check performed by the person named as the declared legal representative.
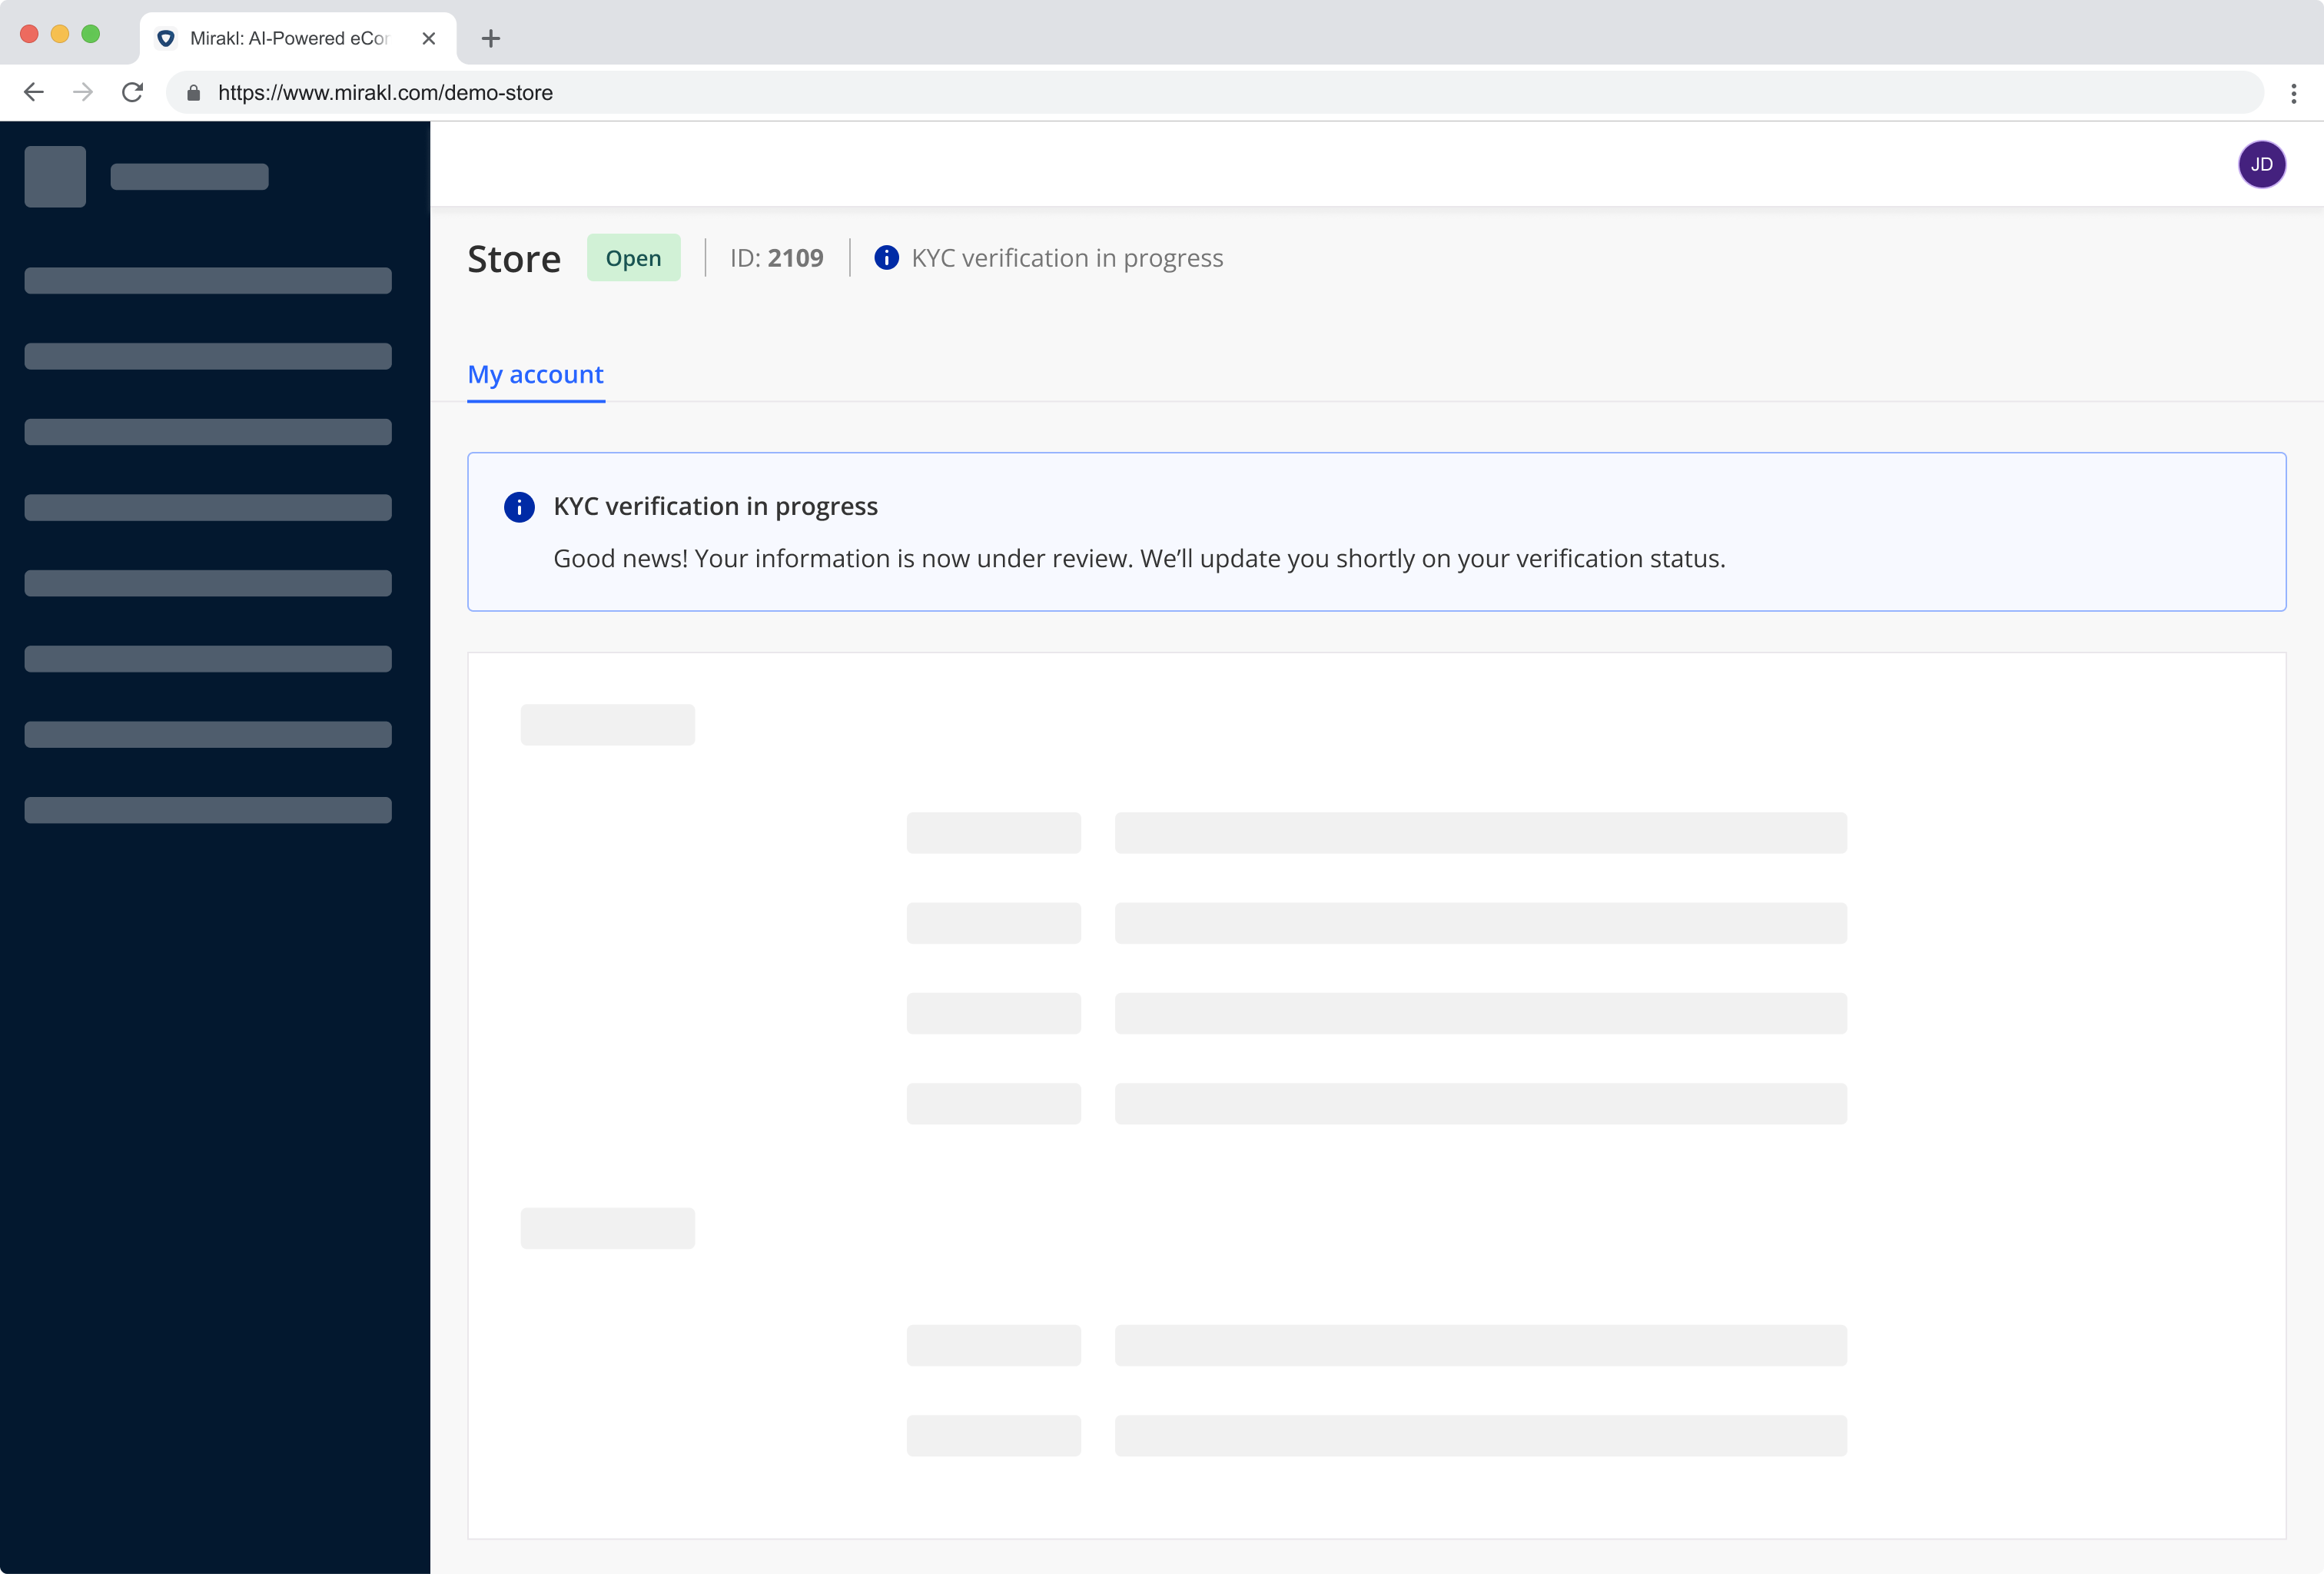
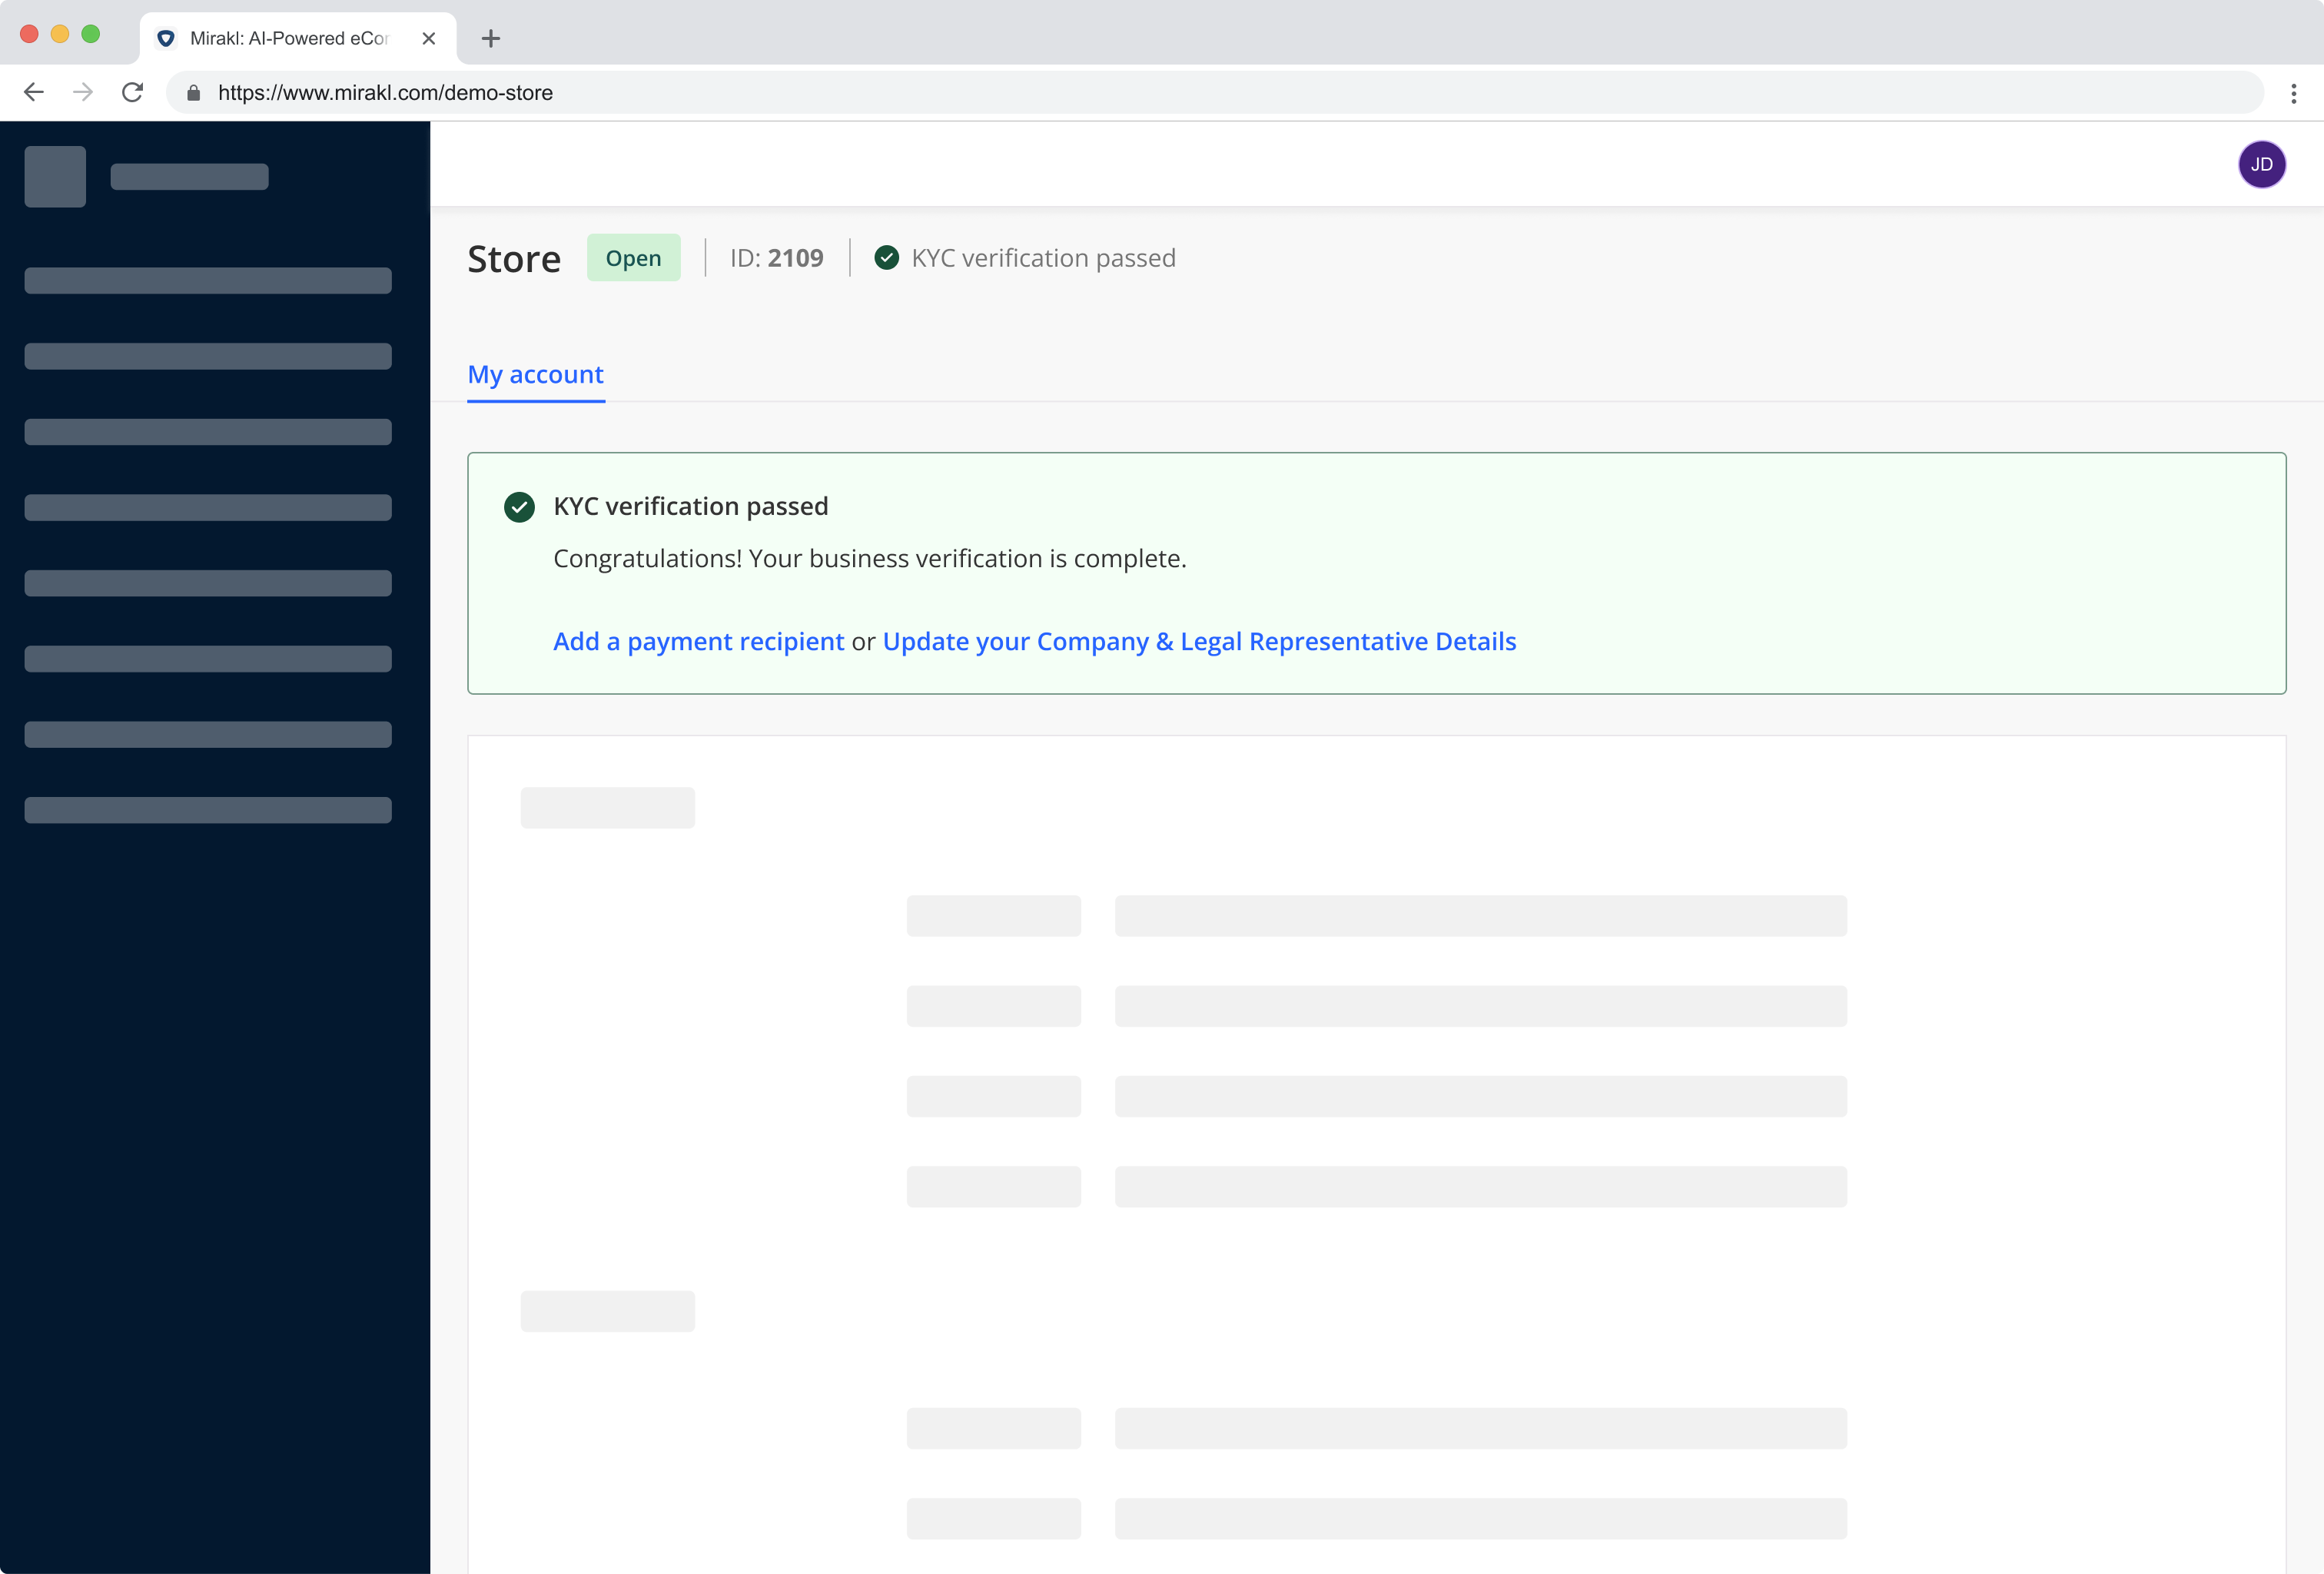
The Mirakl Dashboard displays the progress and outcome
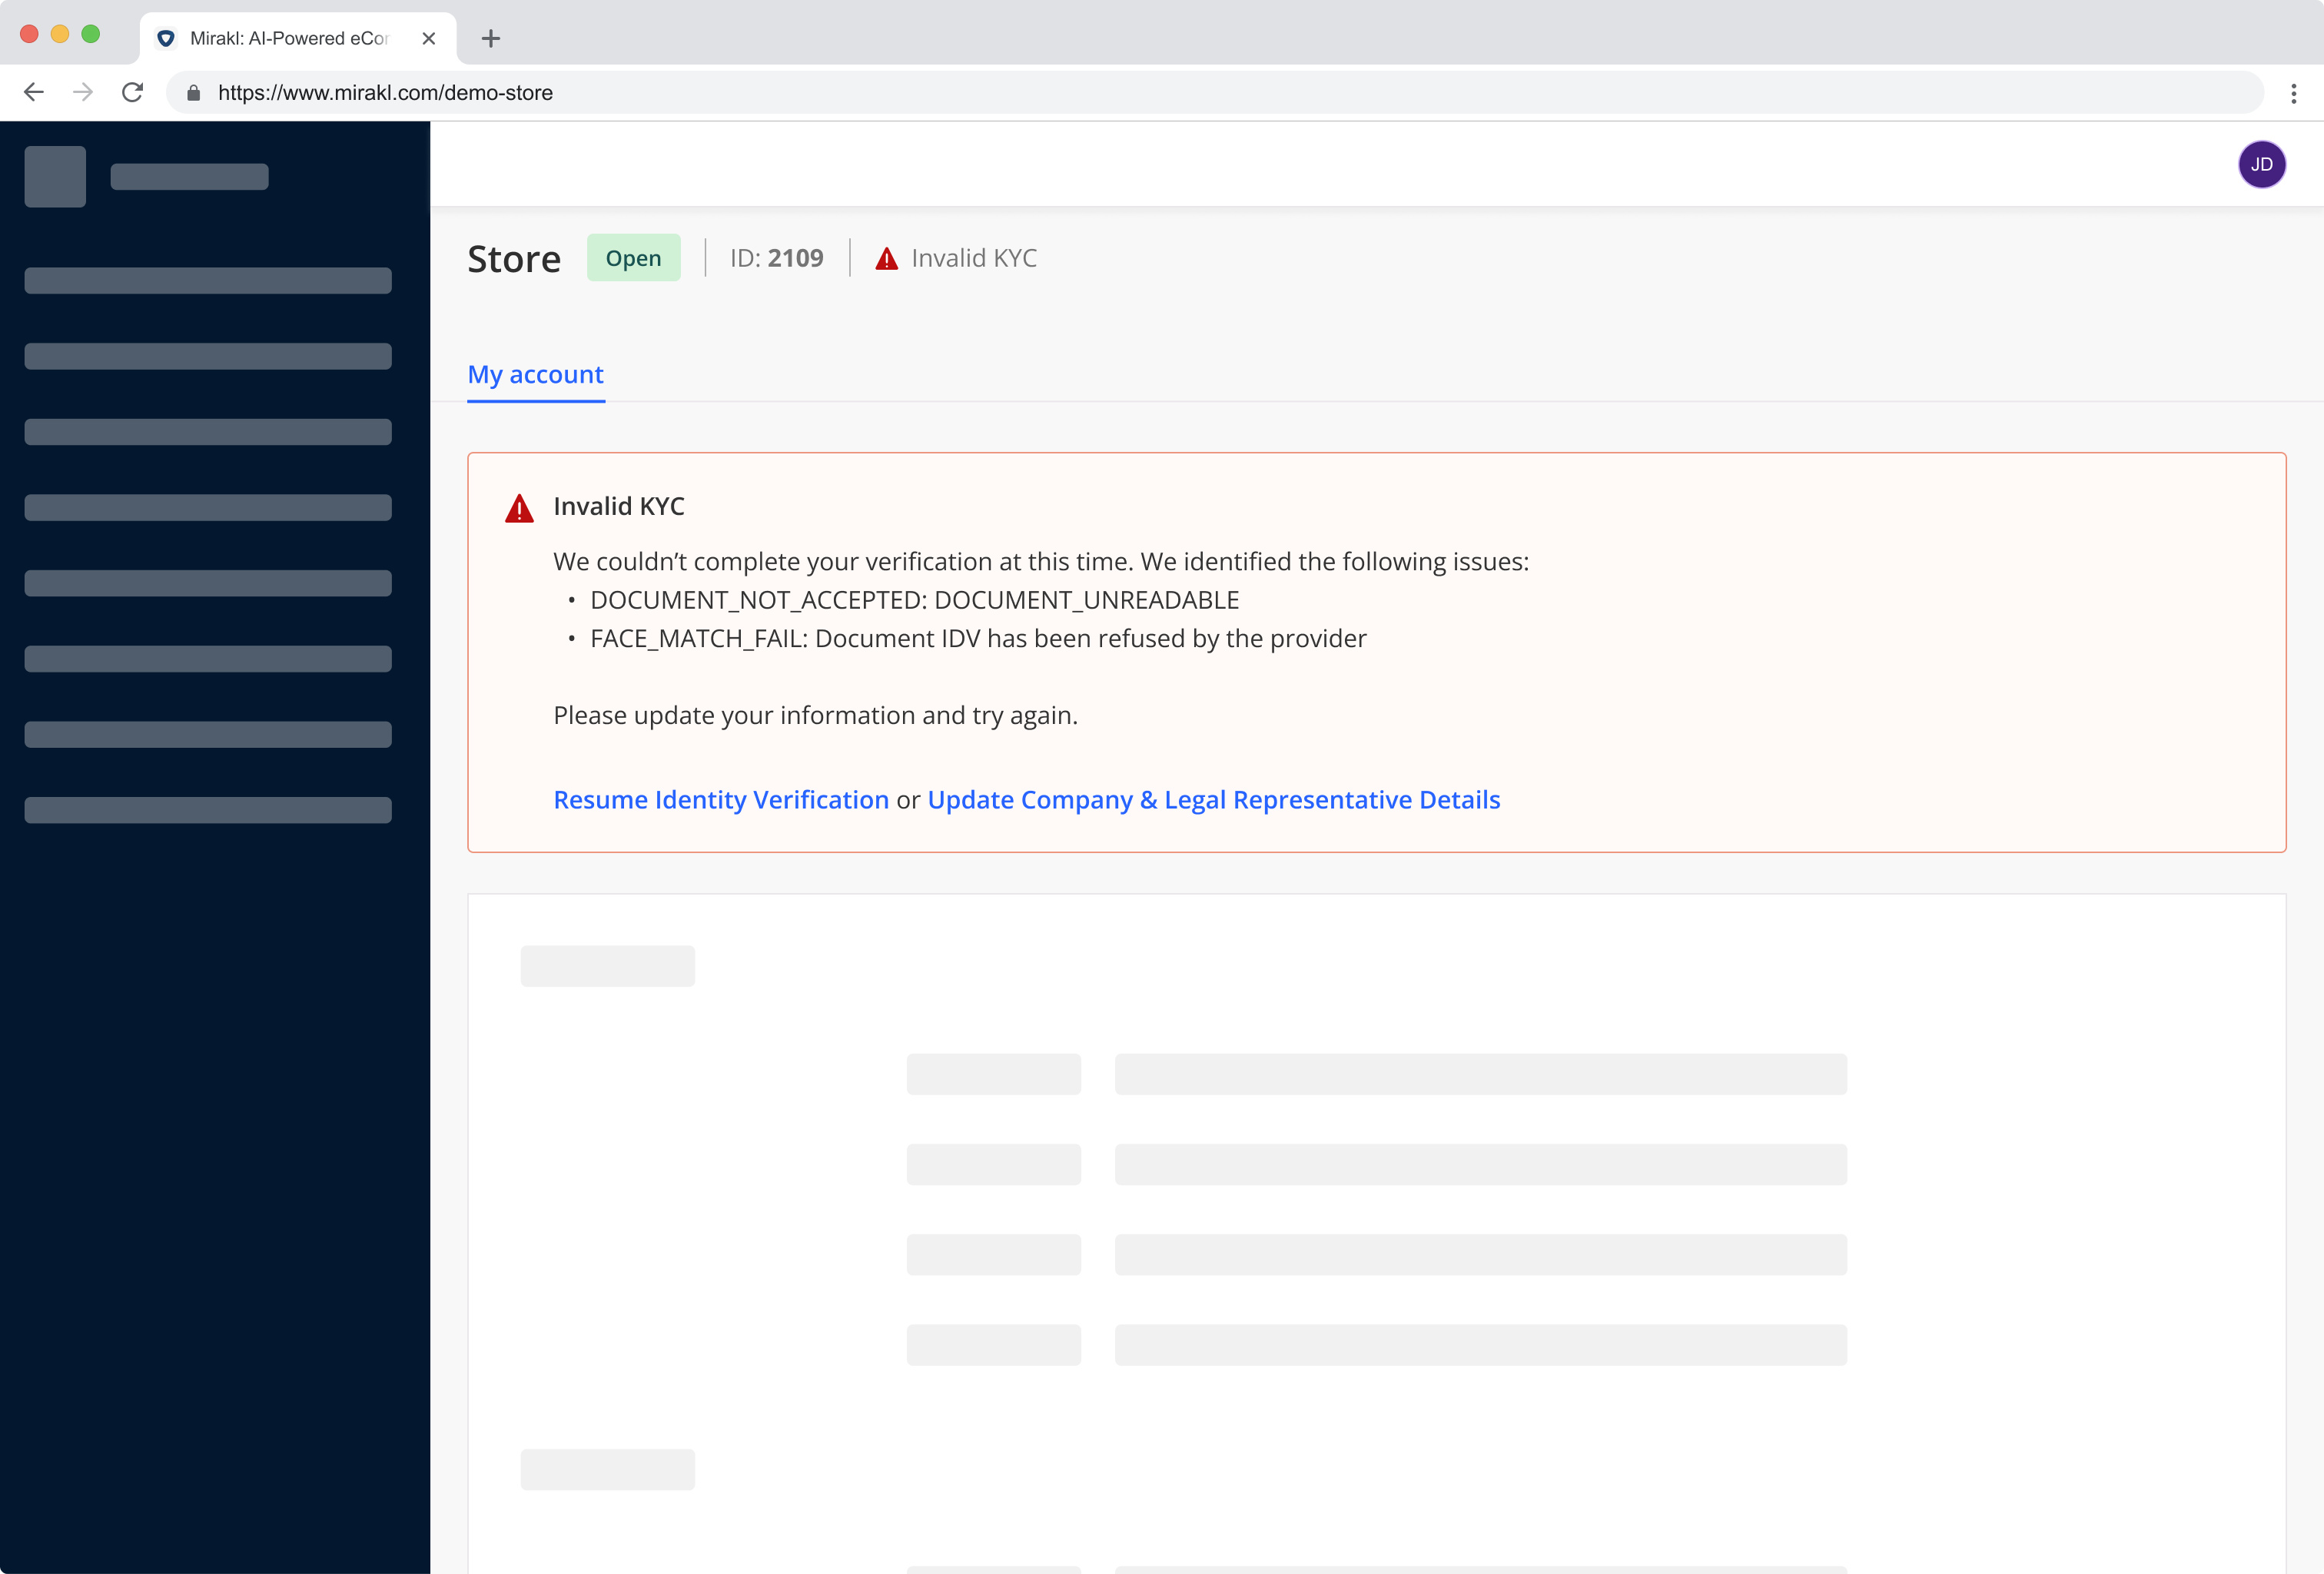
The KYC banner is updated with the outcome of the hosted KYC session.
If one or more checks were unsuccessful, then error messages are given to guide the user in understanding what happened and how they can succeed when they try again.
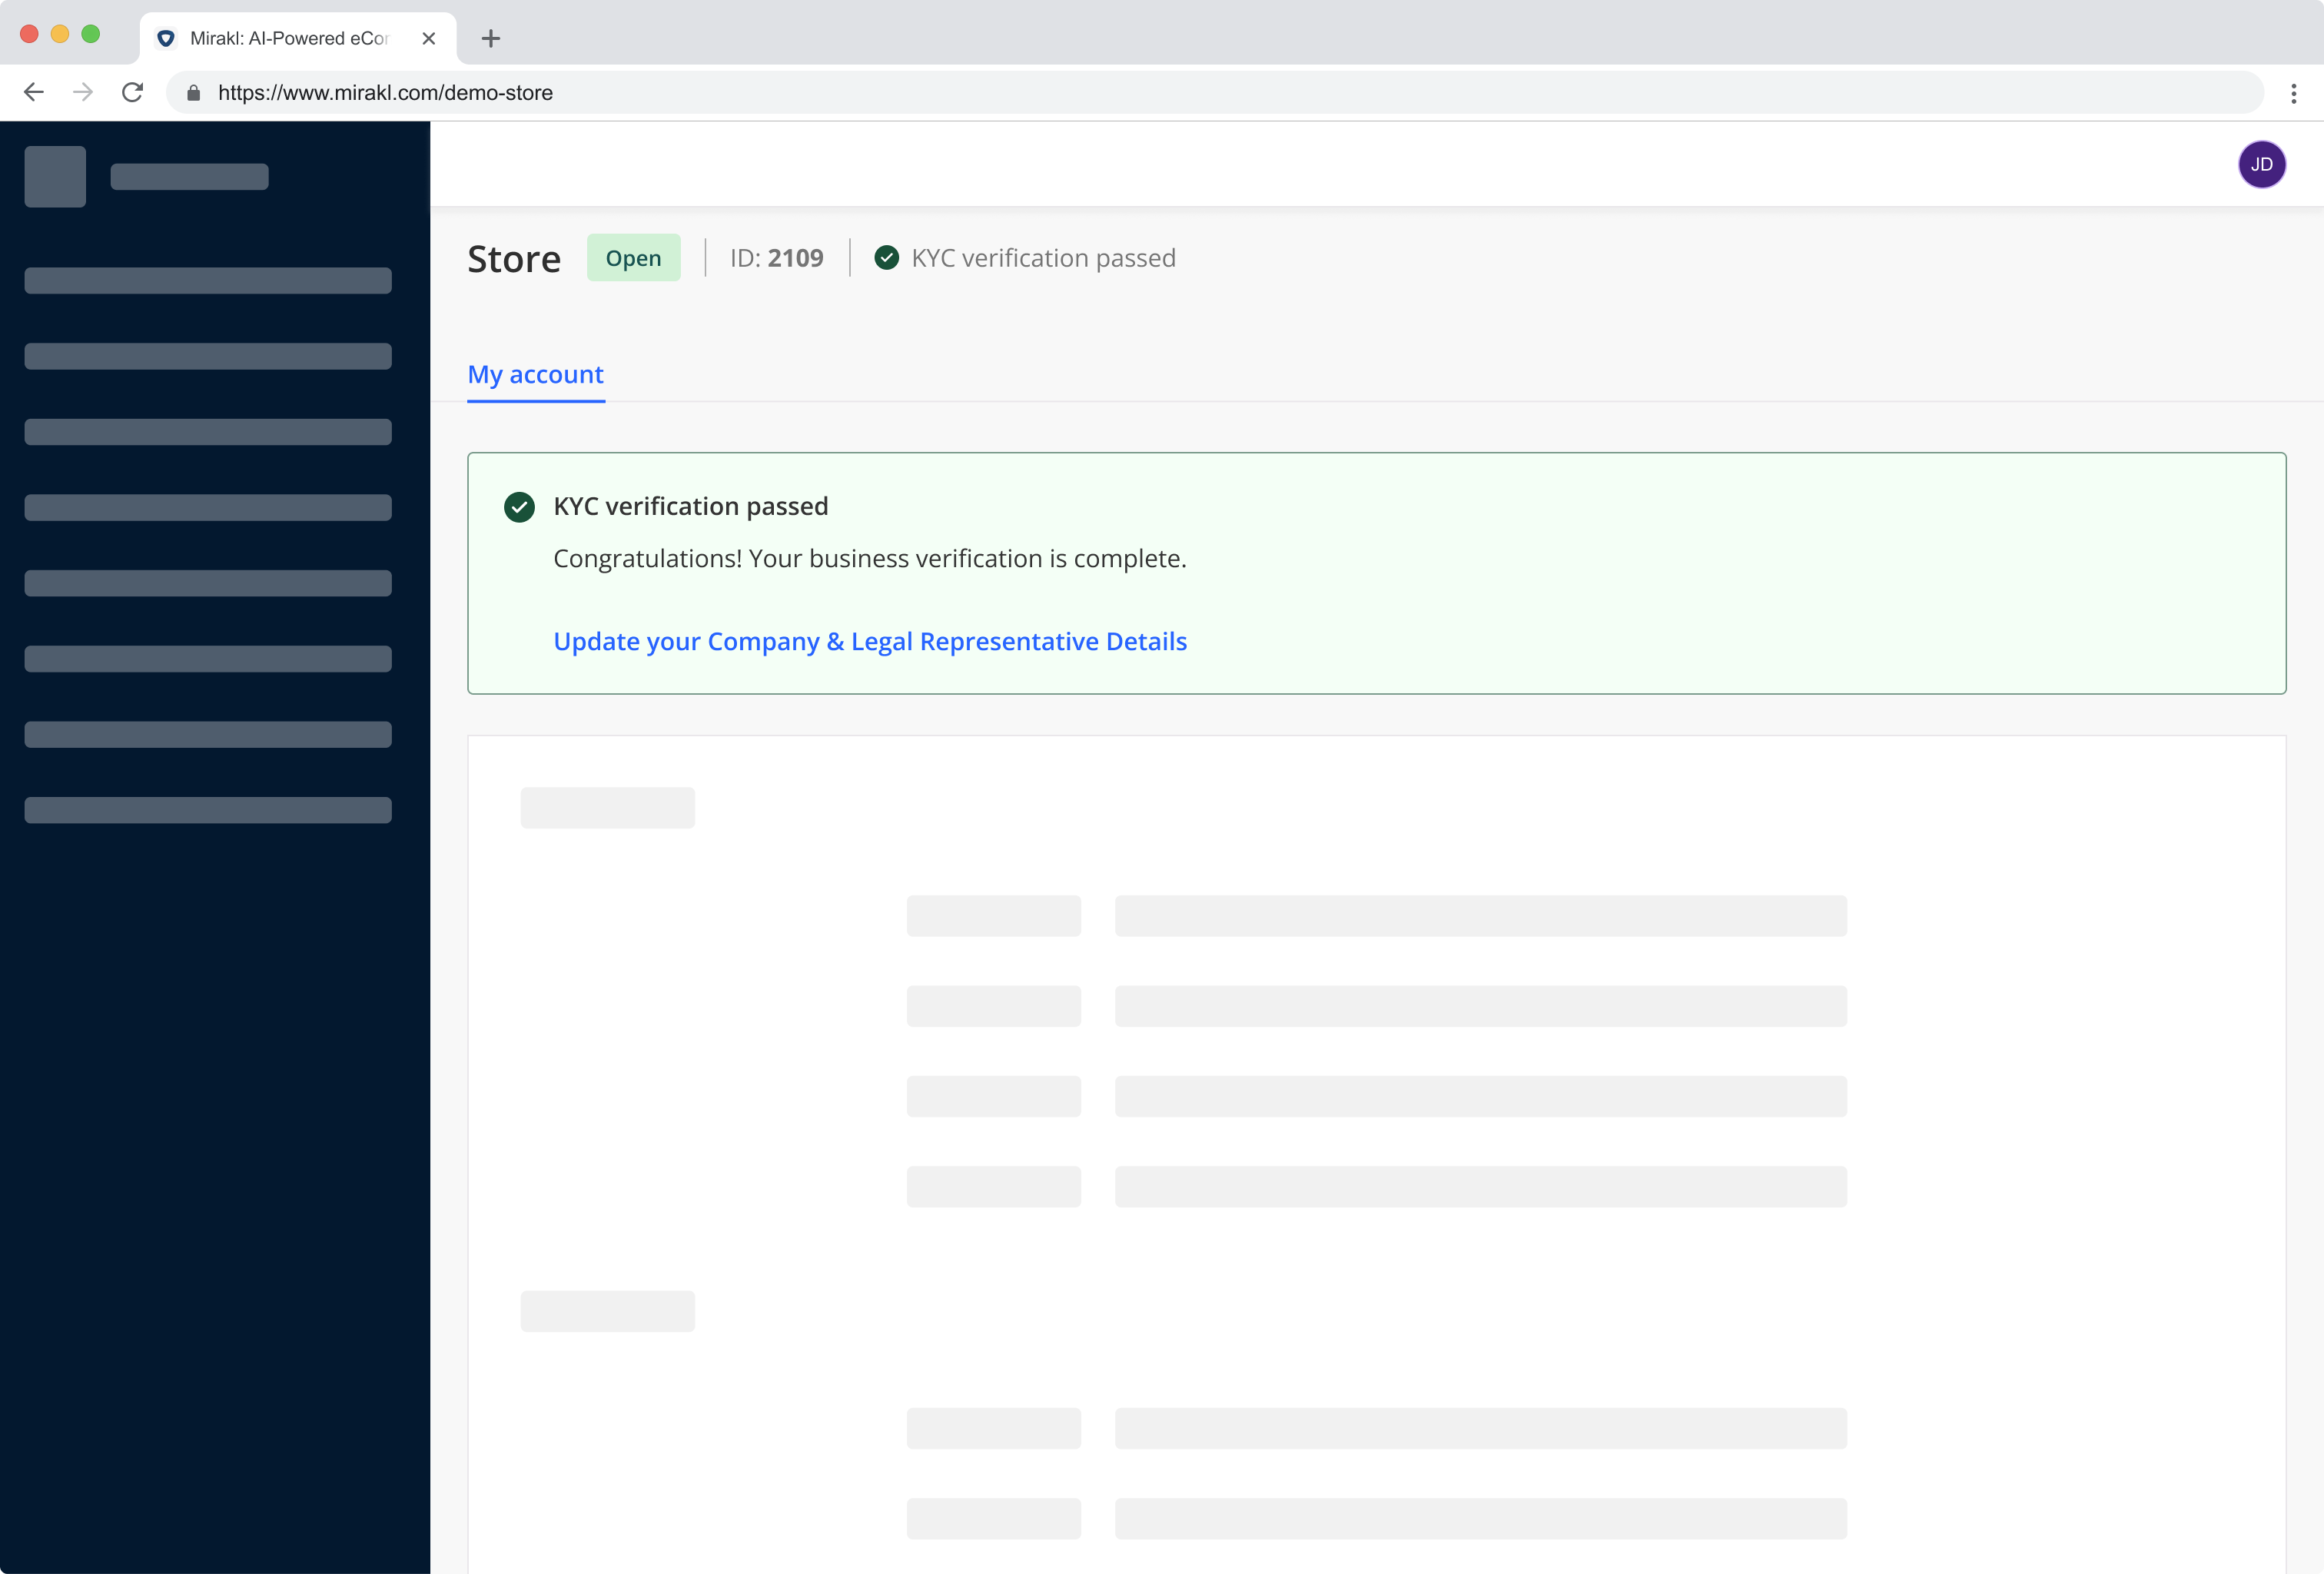
When the verification is successful, the banner on the Mirakl Dashboard is updated.
Note – Connector also handles KYB data updates
If the seller wishes to modify identity data of the person who completed the KYC/B check, then they are again redirected to Mangopay’s hosted KYC/B experience to verify the new individual.
Recipient creation
The Recipient (bank account) registration flow is as follows:
Mangopay detects Seller without Recipient
Mangopay’s Mirakl Connector checks for sellers that haven’t registered an external bank account. If detected, the connector updates Mirakl’s KYC banner with messaging and a link to the Mangopay hosted webpage.
The Seller clicks the link to hosted account registration
The link takes the Seller to Mangopay’s hosted recipient registration to add a new bank account (which is a Recipient object in Mangopay API terms).
The Seller completes all parts of the form
The Seller completes the form to add their bank details, registered name, and address.
The form checks the format of the bank details based on the country and currency combination, and then validates the user’s data against the schema using the POST Validate data for a Recipient endpoint. Any issues are returned to the user on the form.
Once the data is validated, the connector calls the POST Create a Recipient endpoint to register the bank account.
The Seller performs SCA
The Seller is redirected to Mangopay’s hosted SCA session to authenticate the new bank account.
Migration from legacy
Caution – Actions below are irreversible and must only be done after activation
The additions to the new fully hosted onboarding (described above) must be activated before your platform takes the actions below.
The actions below irreversibly disable the previously used onboarding flows. Removing them prematurely will prevent your sellers from onboarding successfully.
If you have any doubt, please contact Mangopay via the Dashboard.
Once Mangopay has activated the new fully hosted seller onboarding experiences described above, your platform needs to remove the following redundant settings from the Mirakl Dashboard.
1. Delete Mangopay custom fields in Mirakl
- Go to Settings > Stores > Profile configuration
- Delete the custom fields required by the Mangopay connector (e.g.,
legalrep-firstname). Note that deletion is not instantaneous and may take some time to complete.
See full list of custom fields that can be deleted
legalrep-firstnamelegalrep-lastnamelegalrepaddress-addressline1legalrepaddress-addressline2legalrepaddress-citylegalrepaddress-regionlegalrepaddress-postalcodelegalerepaddress-countrylegalrep-birthdaylegalrep-emaillegalrep-nationalitylegalrep-countryofresidencemgp-t-and-clegal-userregistered-company-namecompanynumbernot-applicableubo-2,ubo-3,ubo-4ubo-1-first-name,ubo-2-first-name,ubo-3-first-name,ubo-4-first-nameubo-1-last-name,ubo-2-last-name,ubo-3-last-name,ubo-4-last-nameubo-1-address-line1,ubo-2-address-line1,ubo-3-address-line1,ubo-4-address-line1ubo-1-address-line2,ubo-2-address-line1,ubo-3-address-line1,ubo-4-address-line1ubo-1-address-postal-code,ubo-2-address-postal-code,ubo-3-address-postal-code,ubo-4-address-postal-codeubo-1-address-city,ubo-2-address-city,ubo-3-address-city,ubo-4-address-cityubo-1-address-region,ubo-2-address-region,ubo-3-address-region,ubo-4-address-regionubo-1-address-country,ubo-2-address-country,ubo-3-address-country,ubo-4-address-countryubo-1-nationality,ubo-2-nationality,ubo-3-nationality,ubo-4-nationalityubo-1-birthday,ubo-2-birthday,ubo-3-birthday,ubo-4-birthdayubo-1-birthplace-city,ubo-2-birthplace-city,ubo-3-birthplace-city,ubo-4-birthplace-cityubo-1-birthplace-country,ubo-2-birthplace-country,ubo-3-birthplace-country,ubo-4-birthplace-country
2. Remove bank account details from the Mirakl Dashboard
- Go to Settings > Stores > Payment
- Choose to remove bank account details either:
- Per store (recommended during testing), or
- Globally (for all stores).
Removing these details will:
- Disable operators’ ability to manage bank accounts
- Delete the registered bank accounts linked to each store